> ## Documentation Index
> Fetch the complete documentation index at: https://docs.ravenna.ai/llms.txt
> Use this file to discover all available pages before exploring further.
# Setting up your first Channel
> Create your first Ravenna channel and connect it to a Slack request channel to start receiving and managing tickets where your team works.
After setting up your Workspace, create your first **Channel** and link it to a Slack channel.
If you haven't already, create a public Slack channel for requests. In this example, we use the default request Slack channel for the IT Operations team. This Slack channel will be where employees contact the team.
Most organizations use prefixes in Slack channel names to clarify their purpose, like #support-it or #ask-it.
Every ticket in Ravenna belongs to a Channel. Each Channel has its own settings, integrations, and automation rules. You can connect Channels to Slack channels, enable AI-powered responses, set up email-to-ticket conversion, and more.
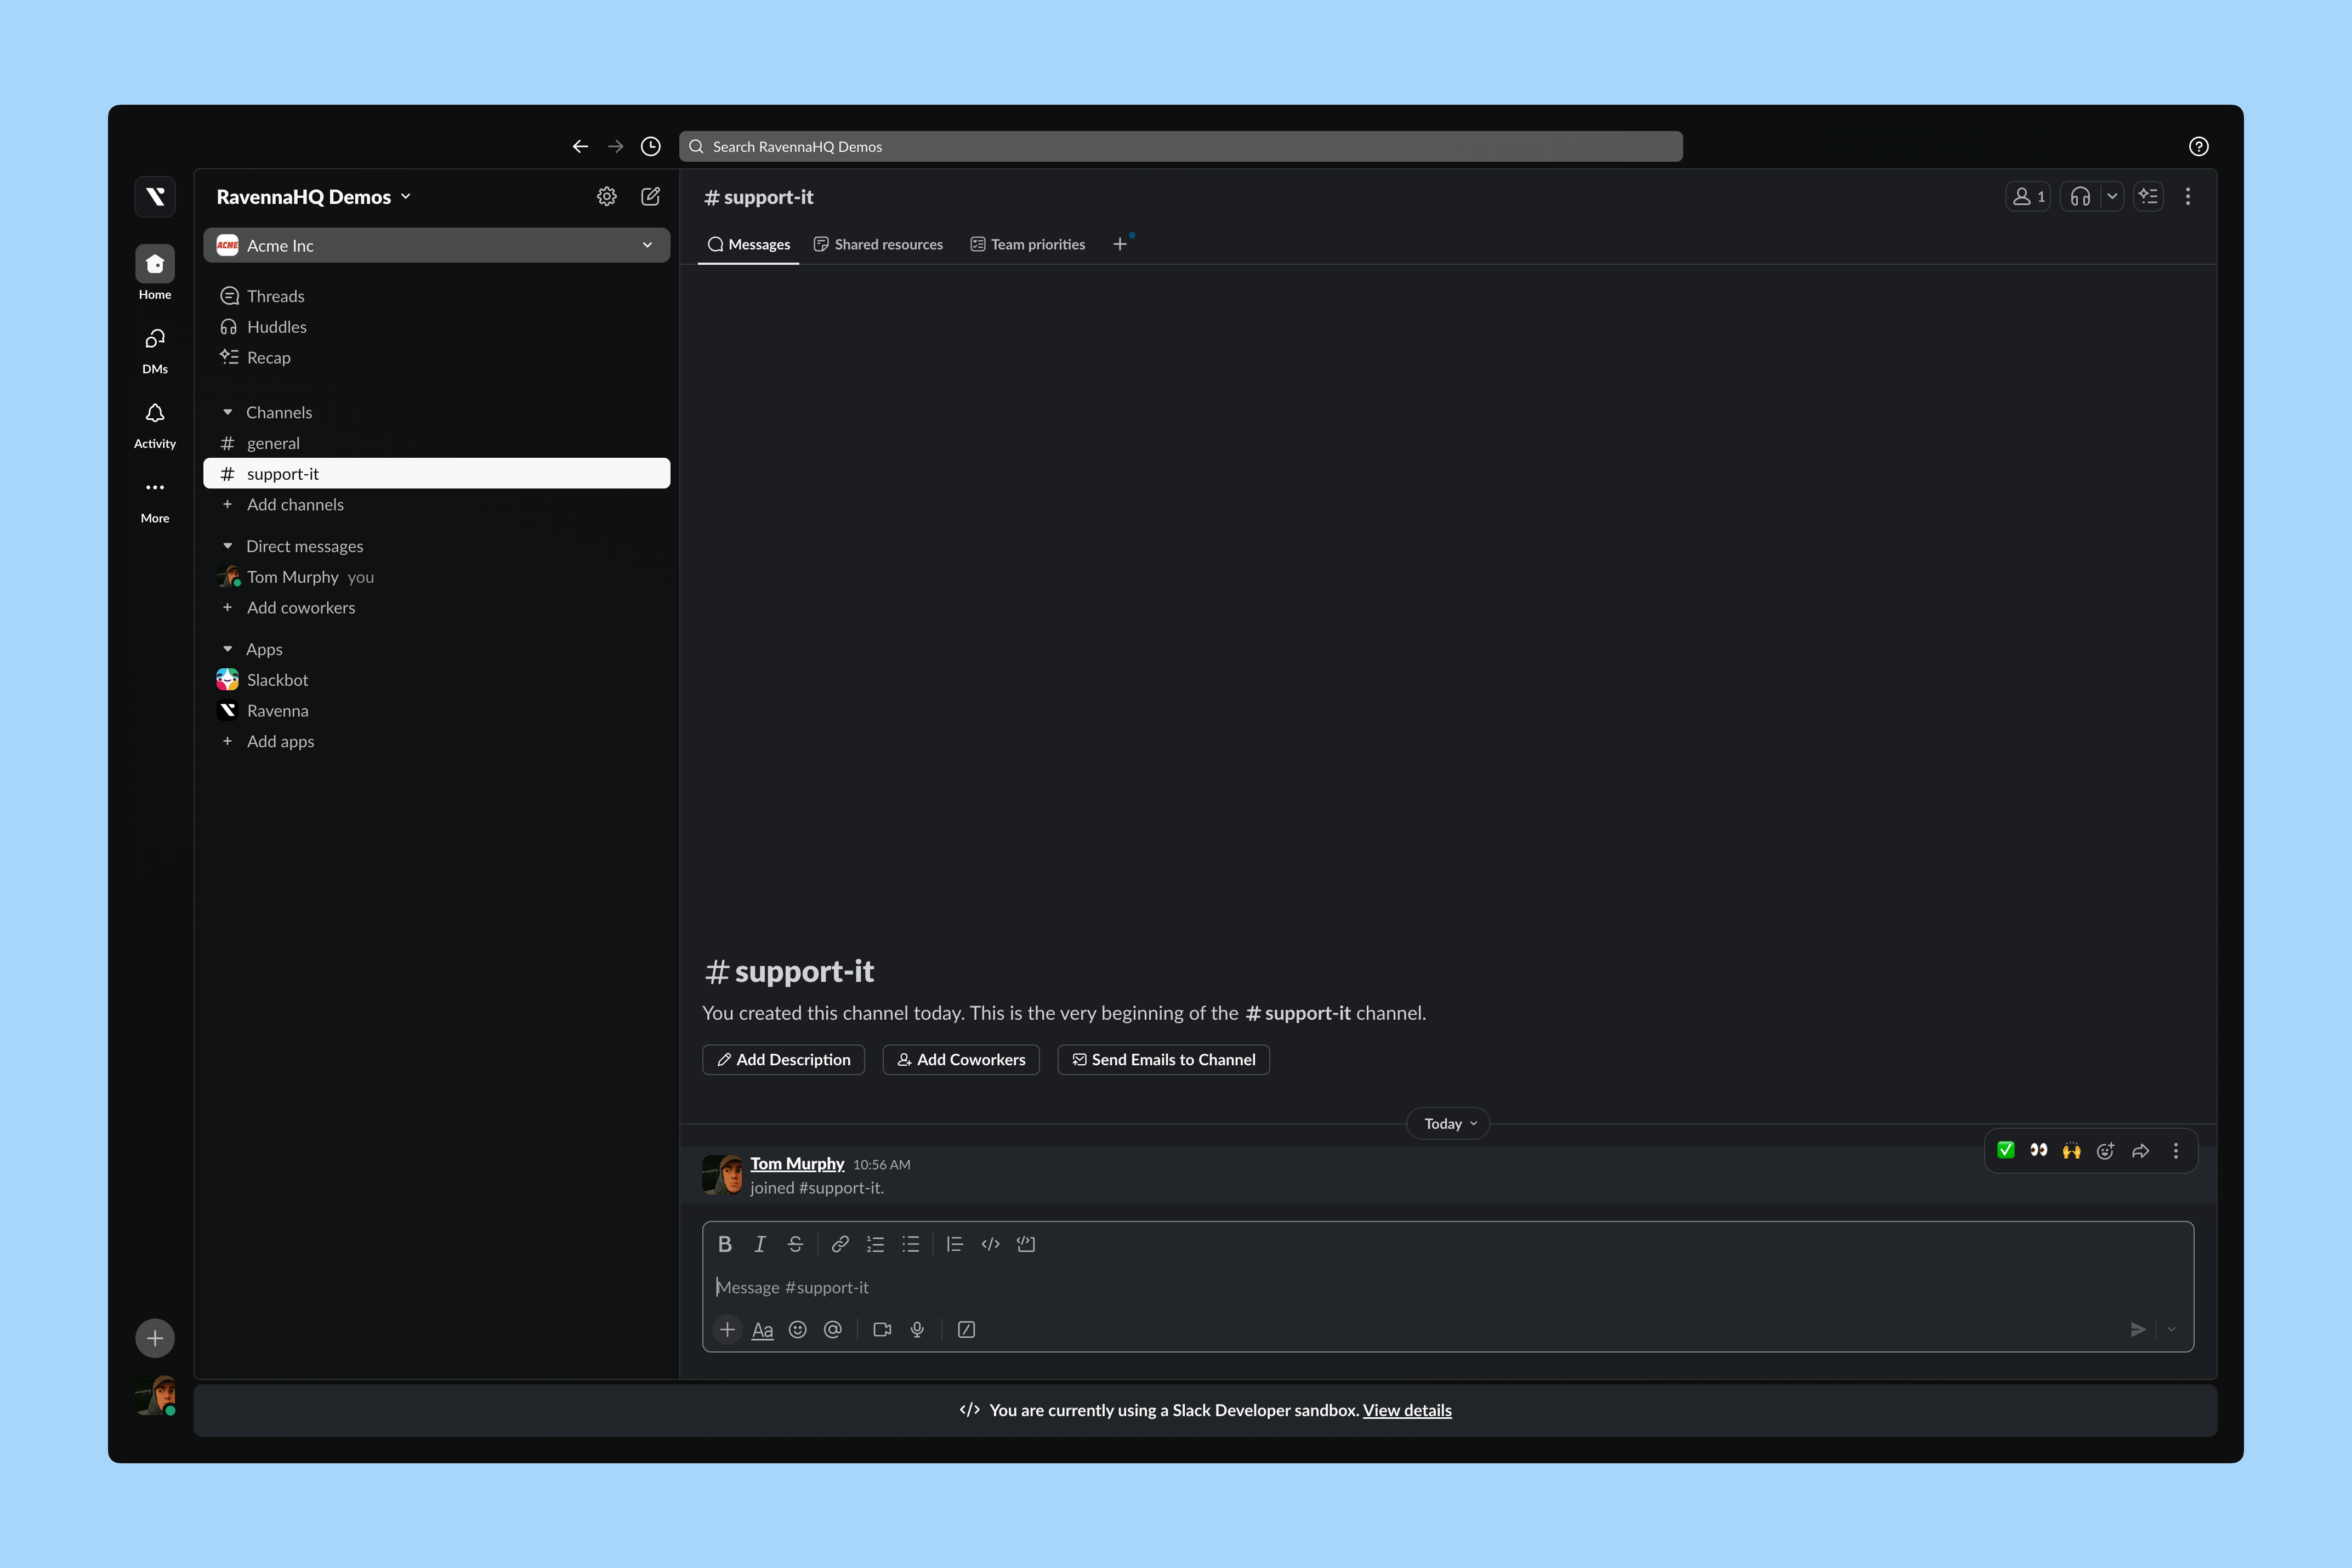
In your Slack channel, send /invite @Ravenna to add Ravenna.
After inviting Ravenna, you receive an acknowledgement message visible only to you.
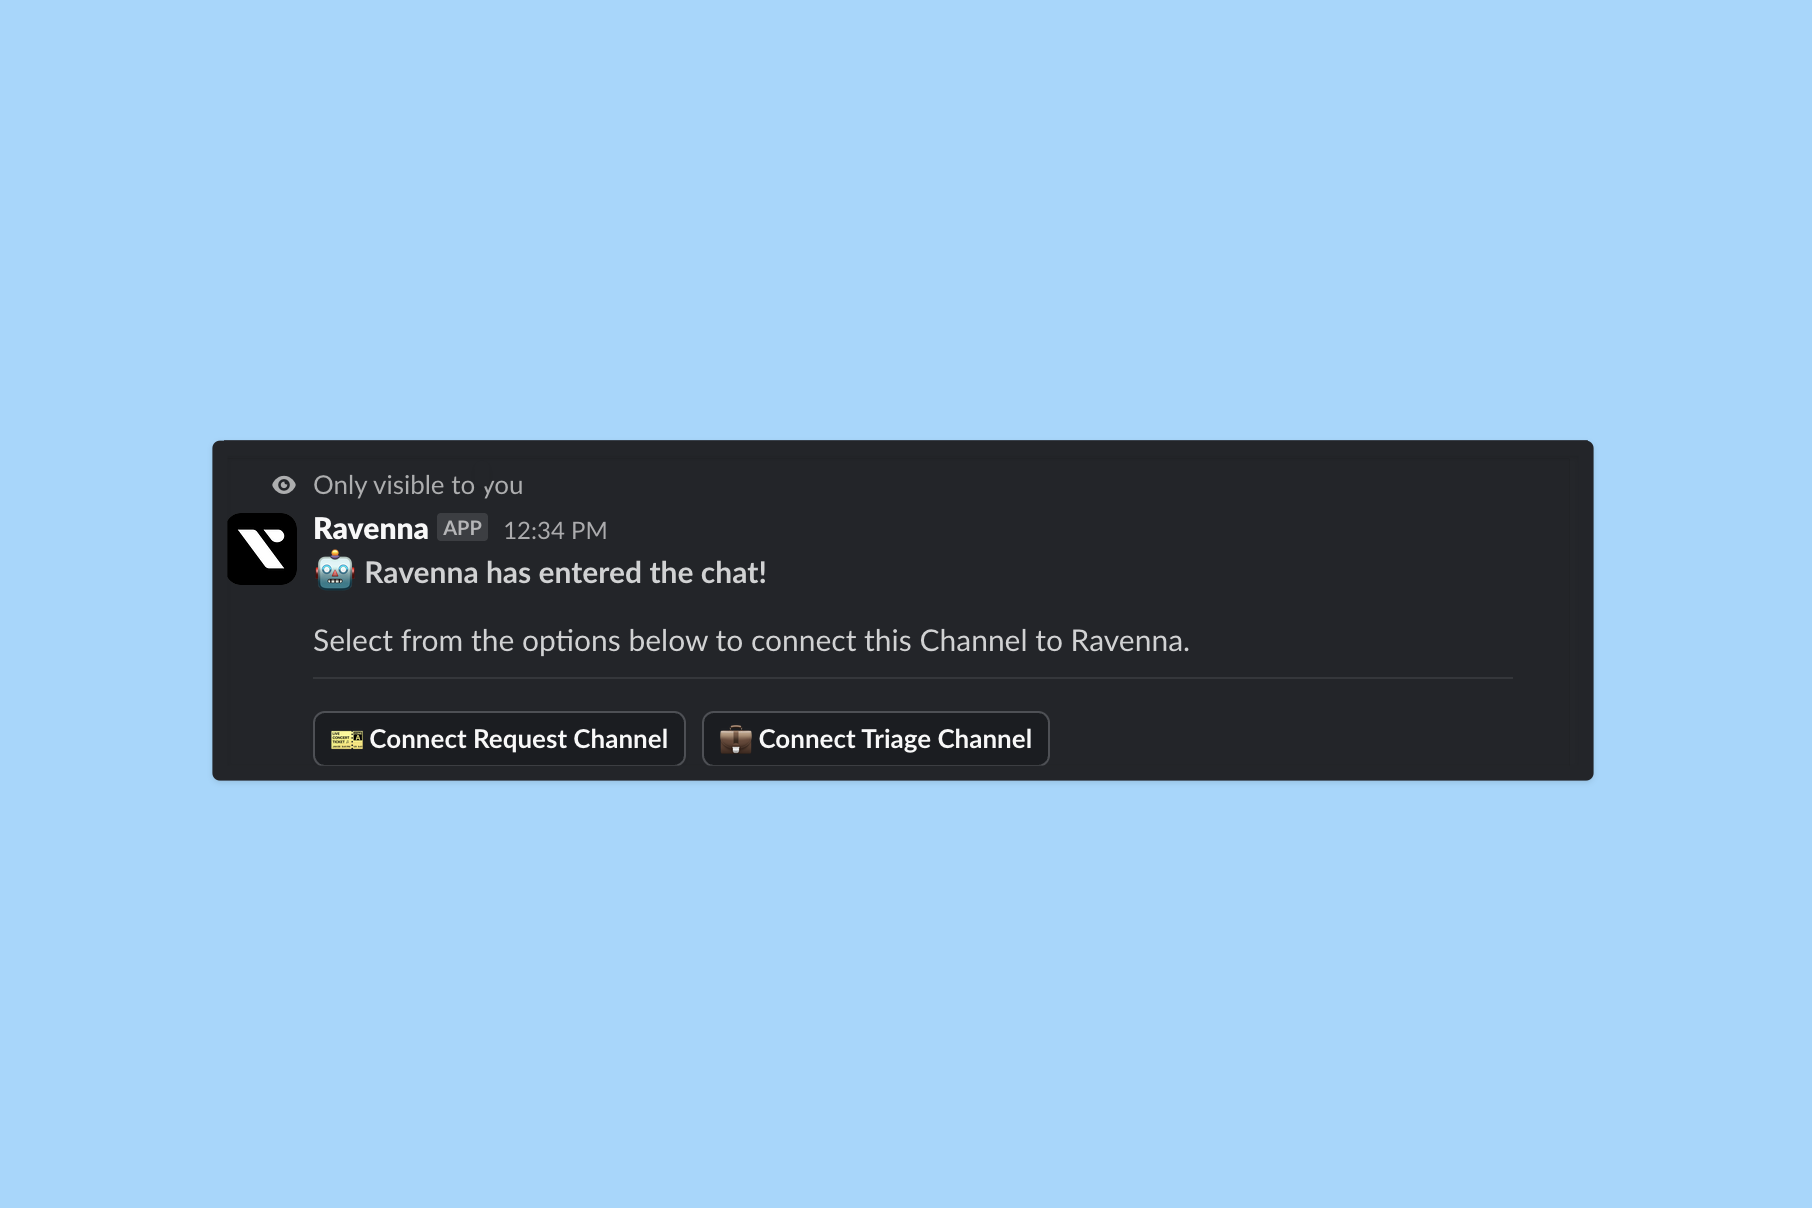
Select the Workspace you created and click Save. This links your Ravenna Workspace to the Slack channel as a Channel. You will see a confirmation in Slack.
In Ravenna, the new Channel appears named after your Slack channel.
Open the Channel and click Settings in the top right corner to adjust behavior.
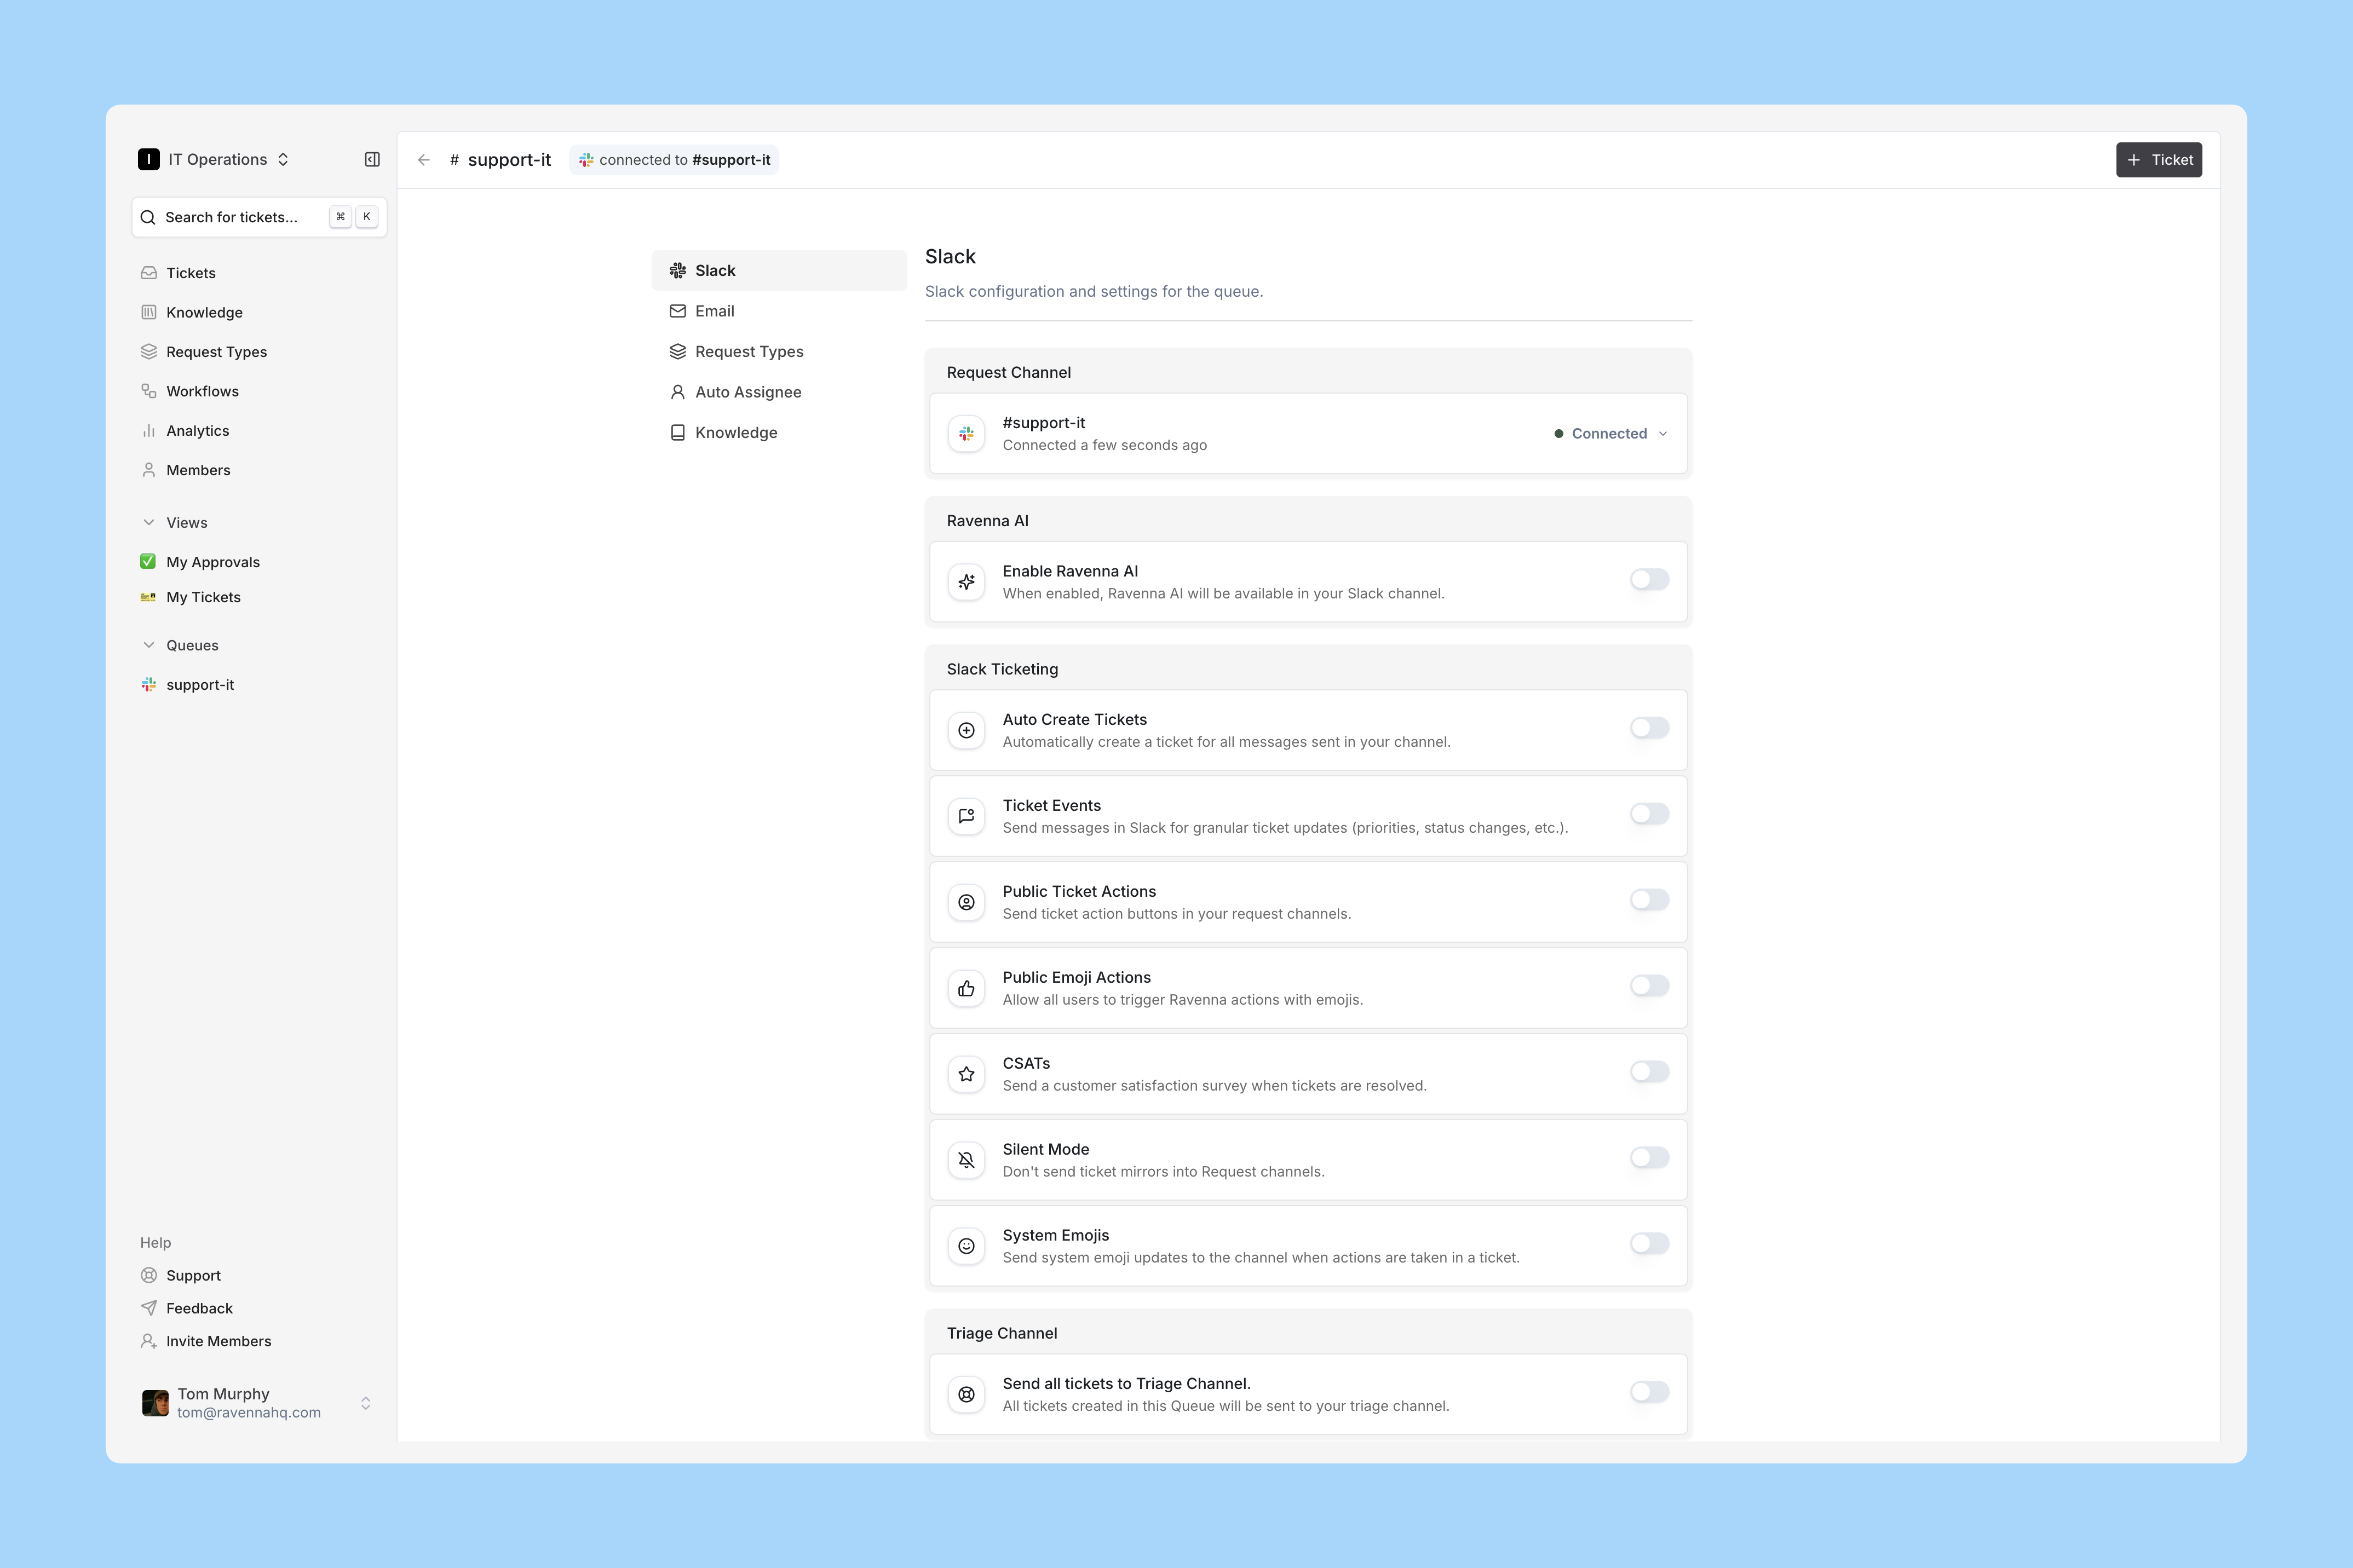
For this demo, enable these typical IT Operations options:
* Auto-Create Tickets
* Public Ticket Actions
* Public Emoji Actions
* CSATs
* System Emojis
Send a message in your Slack channel. Ravenna responds, creating a ticket and threading a **Ticket Mirror**.
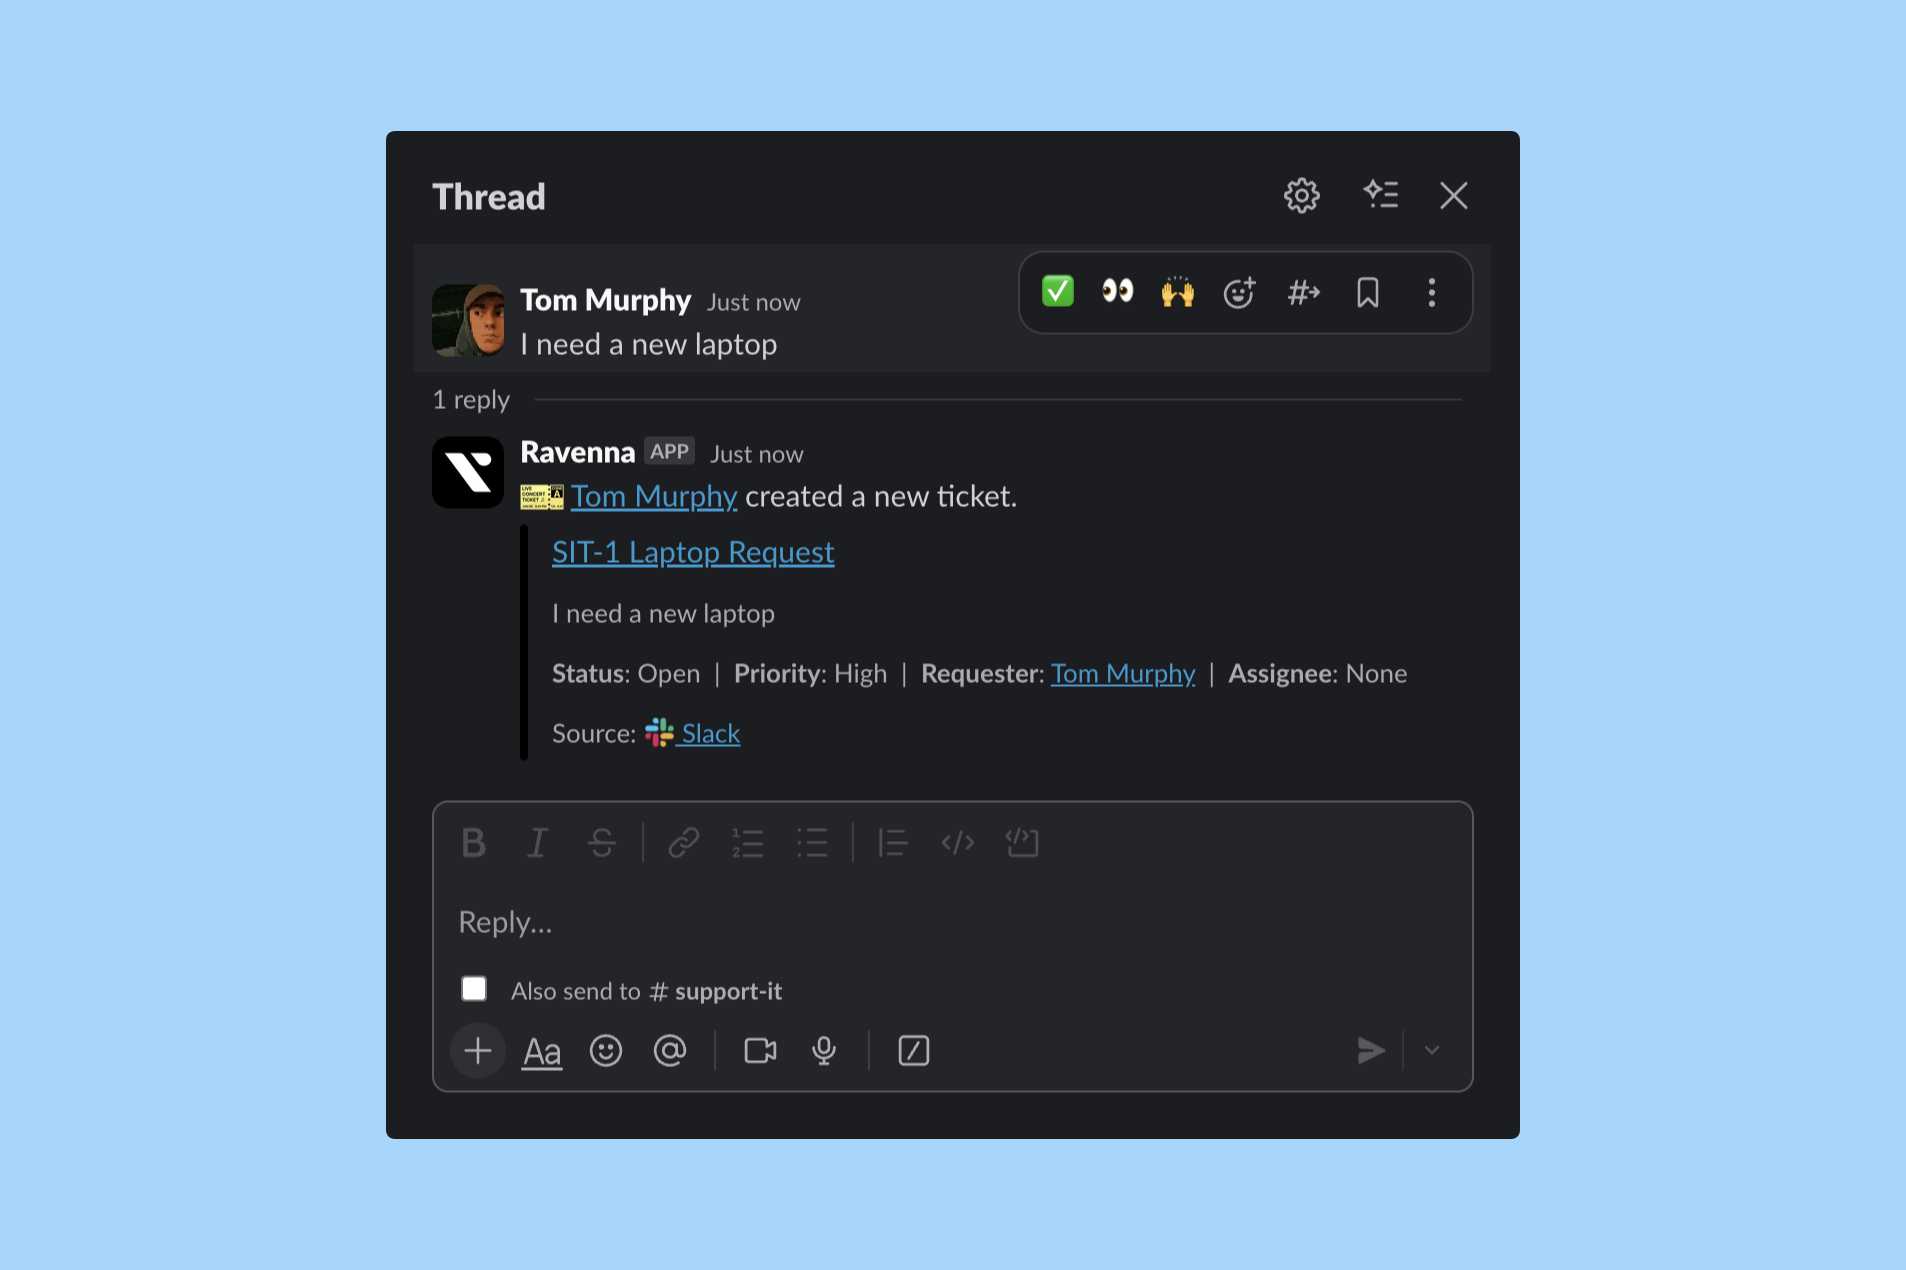
In Ravenna, the ticket syncs with your Slack message.

### Additional tests to try:
* Replying to the Ticket Mirror in Ravenna sends a reply to Slack, impersonating your user profile.
* Replying in Slack sends a reply to the Ticket in Ravenna.
* Assign the ticket to yourself in Ravenna and Ravenna adds an 👀 emoji to the Slack message.
* Add a ✅ emoji reaction in Slack to update the ticket status to "Resolved" in Ravenna and sync it back.
* Receive the CSAT prompt in your DMs from the Ravenna bot.
## Advanced Channel Setup
Learn more about Channel configuration in the [Channel](/integrations/slack/setup) section of the Platform documentation.