

Not sure which authentication method to use? See how the two methods compare and why Ravenna recommends Private Key.
Already connected via Client Secret? You can switch a live Okta integration to Private Key without disconnecting. Complete the Okta-side setup below, then in Ravenna go to Settings > Integrations, open the ⋯ menu on the Okta integration, and choose Update Credentials. Pick Private Key and enter the new values. The integration keeps the same ID, and no cleanup or resync is triggered.
Prerequisites
Before you begin, ensure you have:- Okta Super Admin or Application Administrator access
- Your Okta organization domain
- Permissions to create Application Integrations
- Ability to grant admin roles to service accounts
Setup guide
Create Okta API Service Integration manually
1
Create app integration
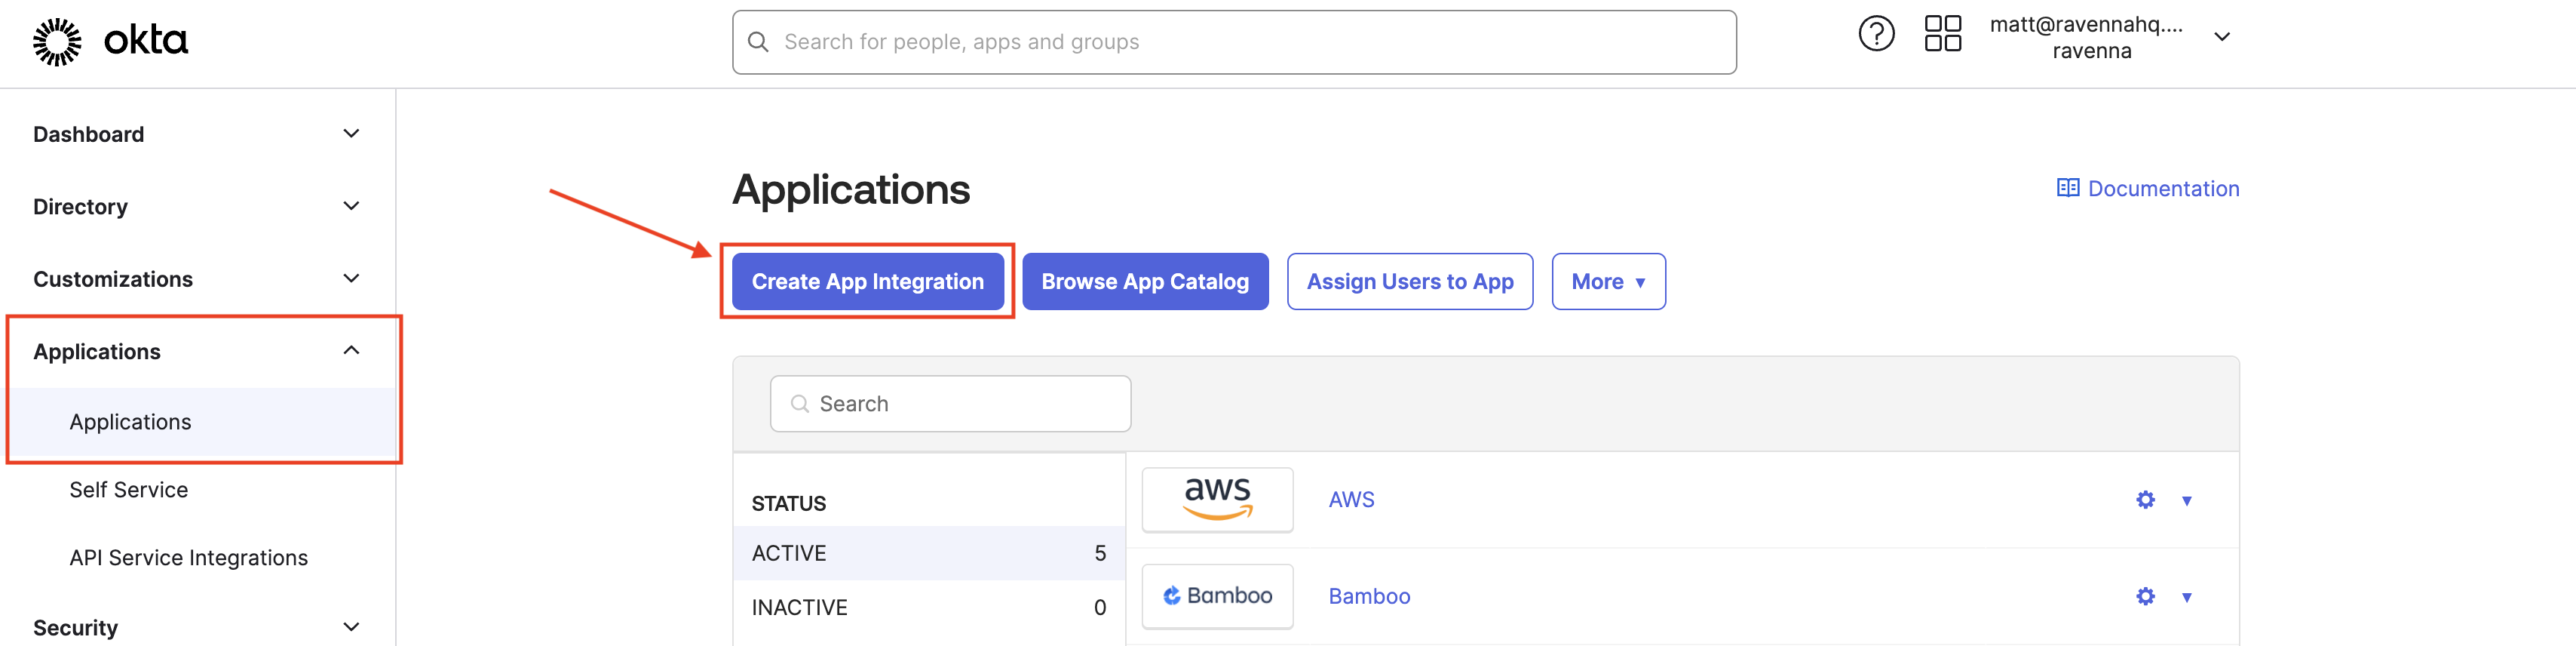
Log in to Okta and navigate to Applications, then select Create App Integration
2
Select integration type
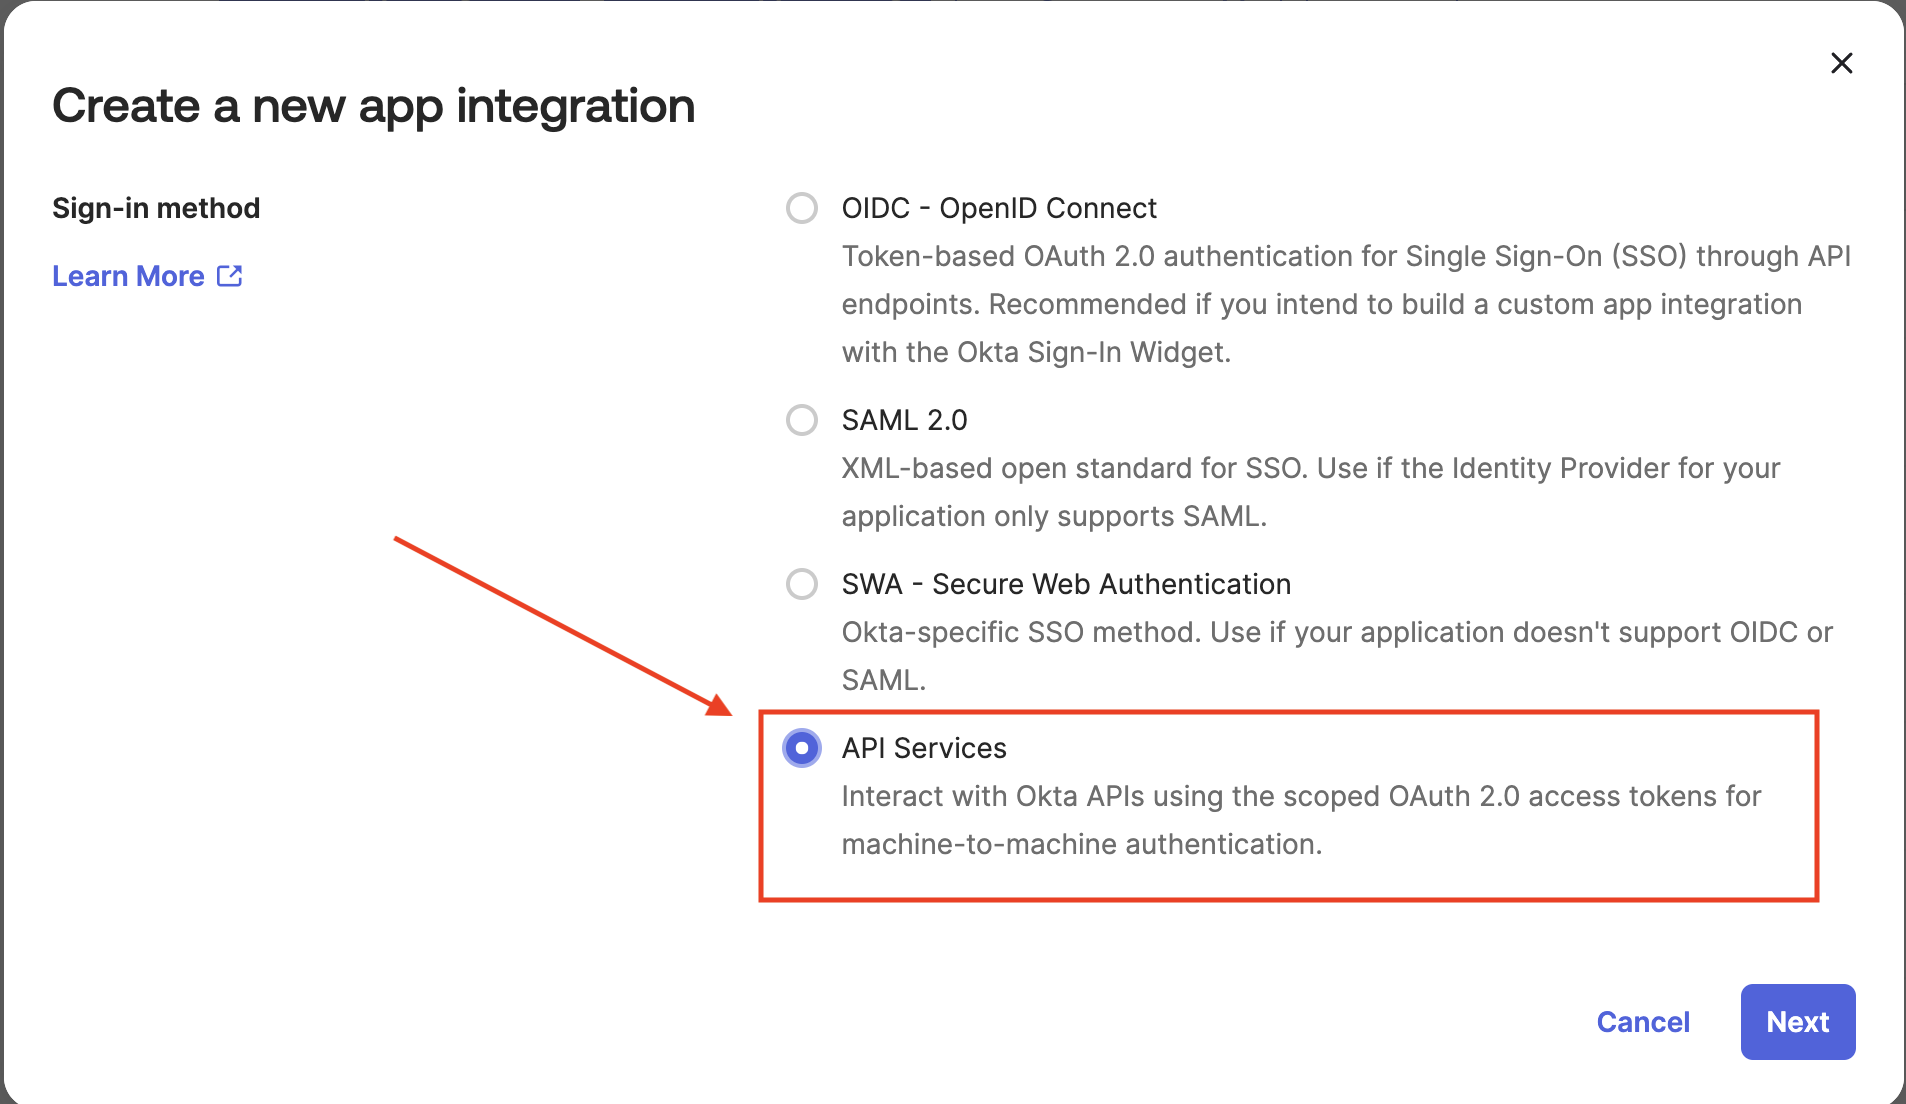
Select API Services as the integration type
3
Name the app integration
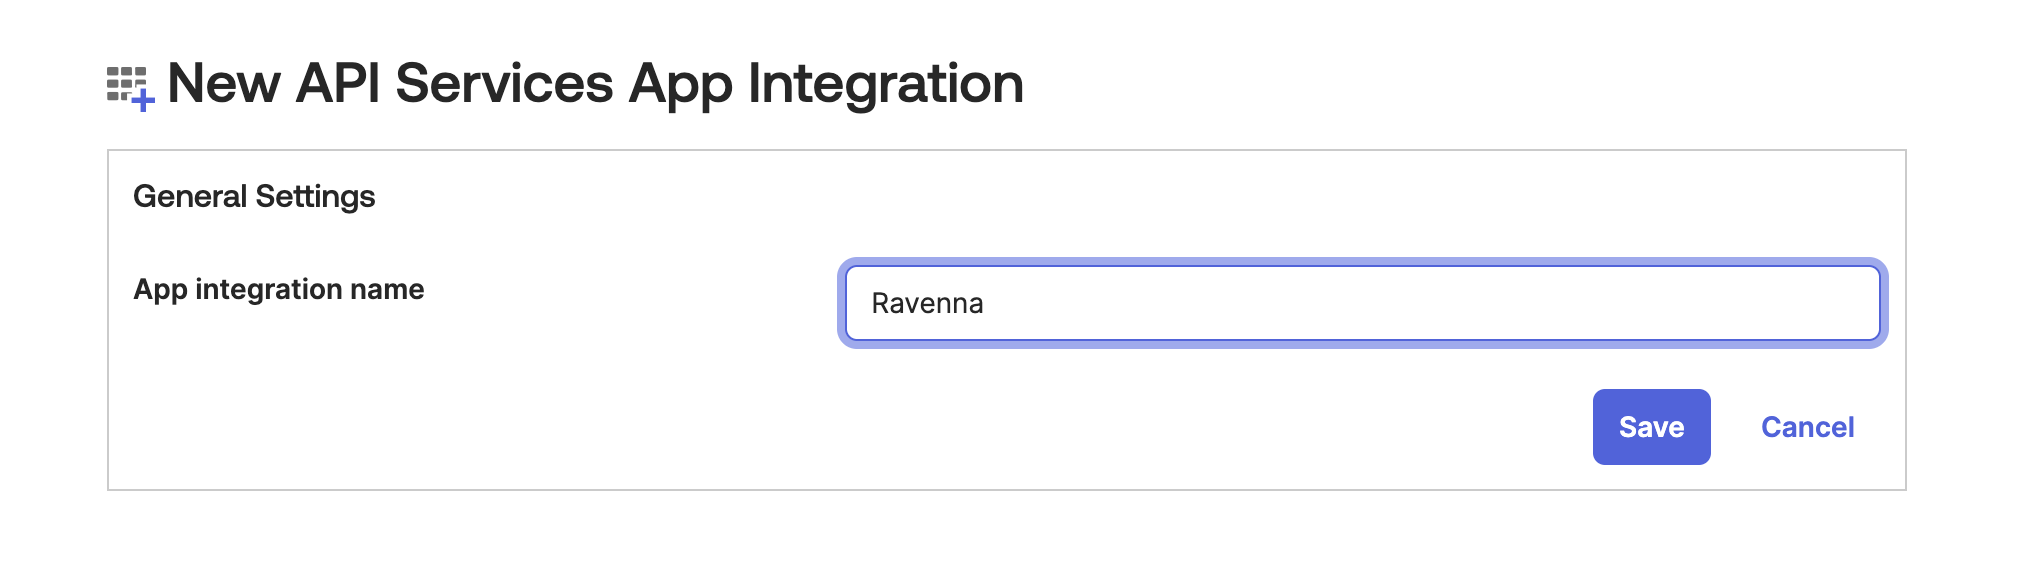
Provide a name for your integration (e.g., “Access Management Integration”) and click Save
4
Configure private key authentication
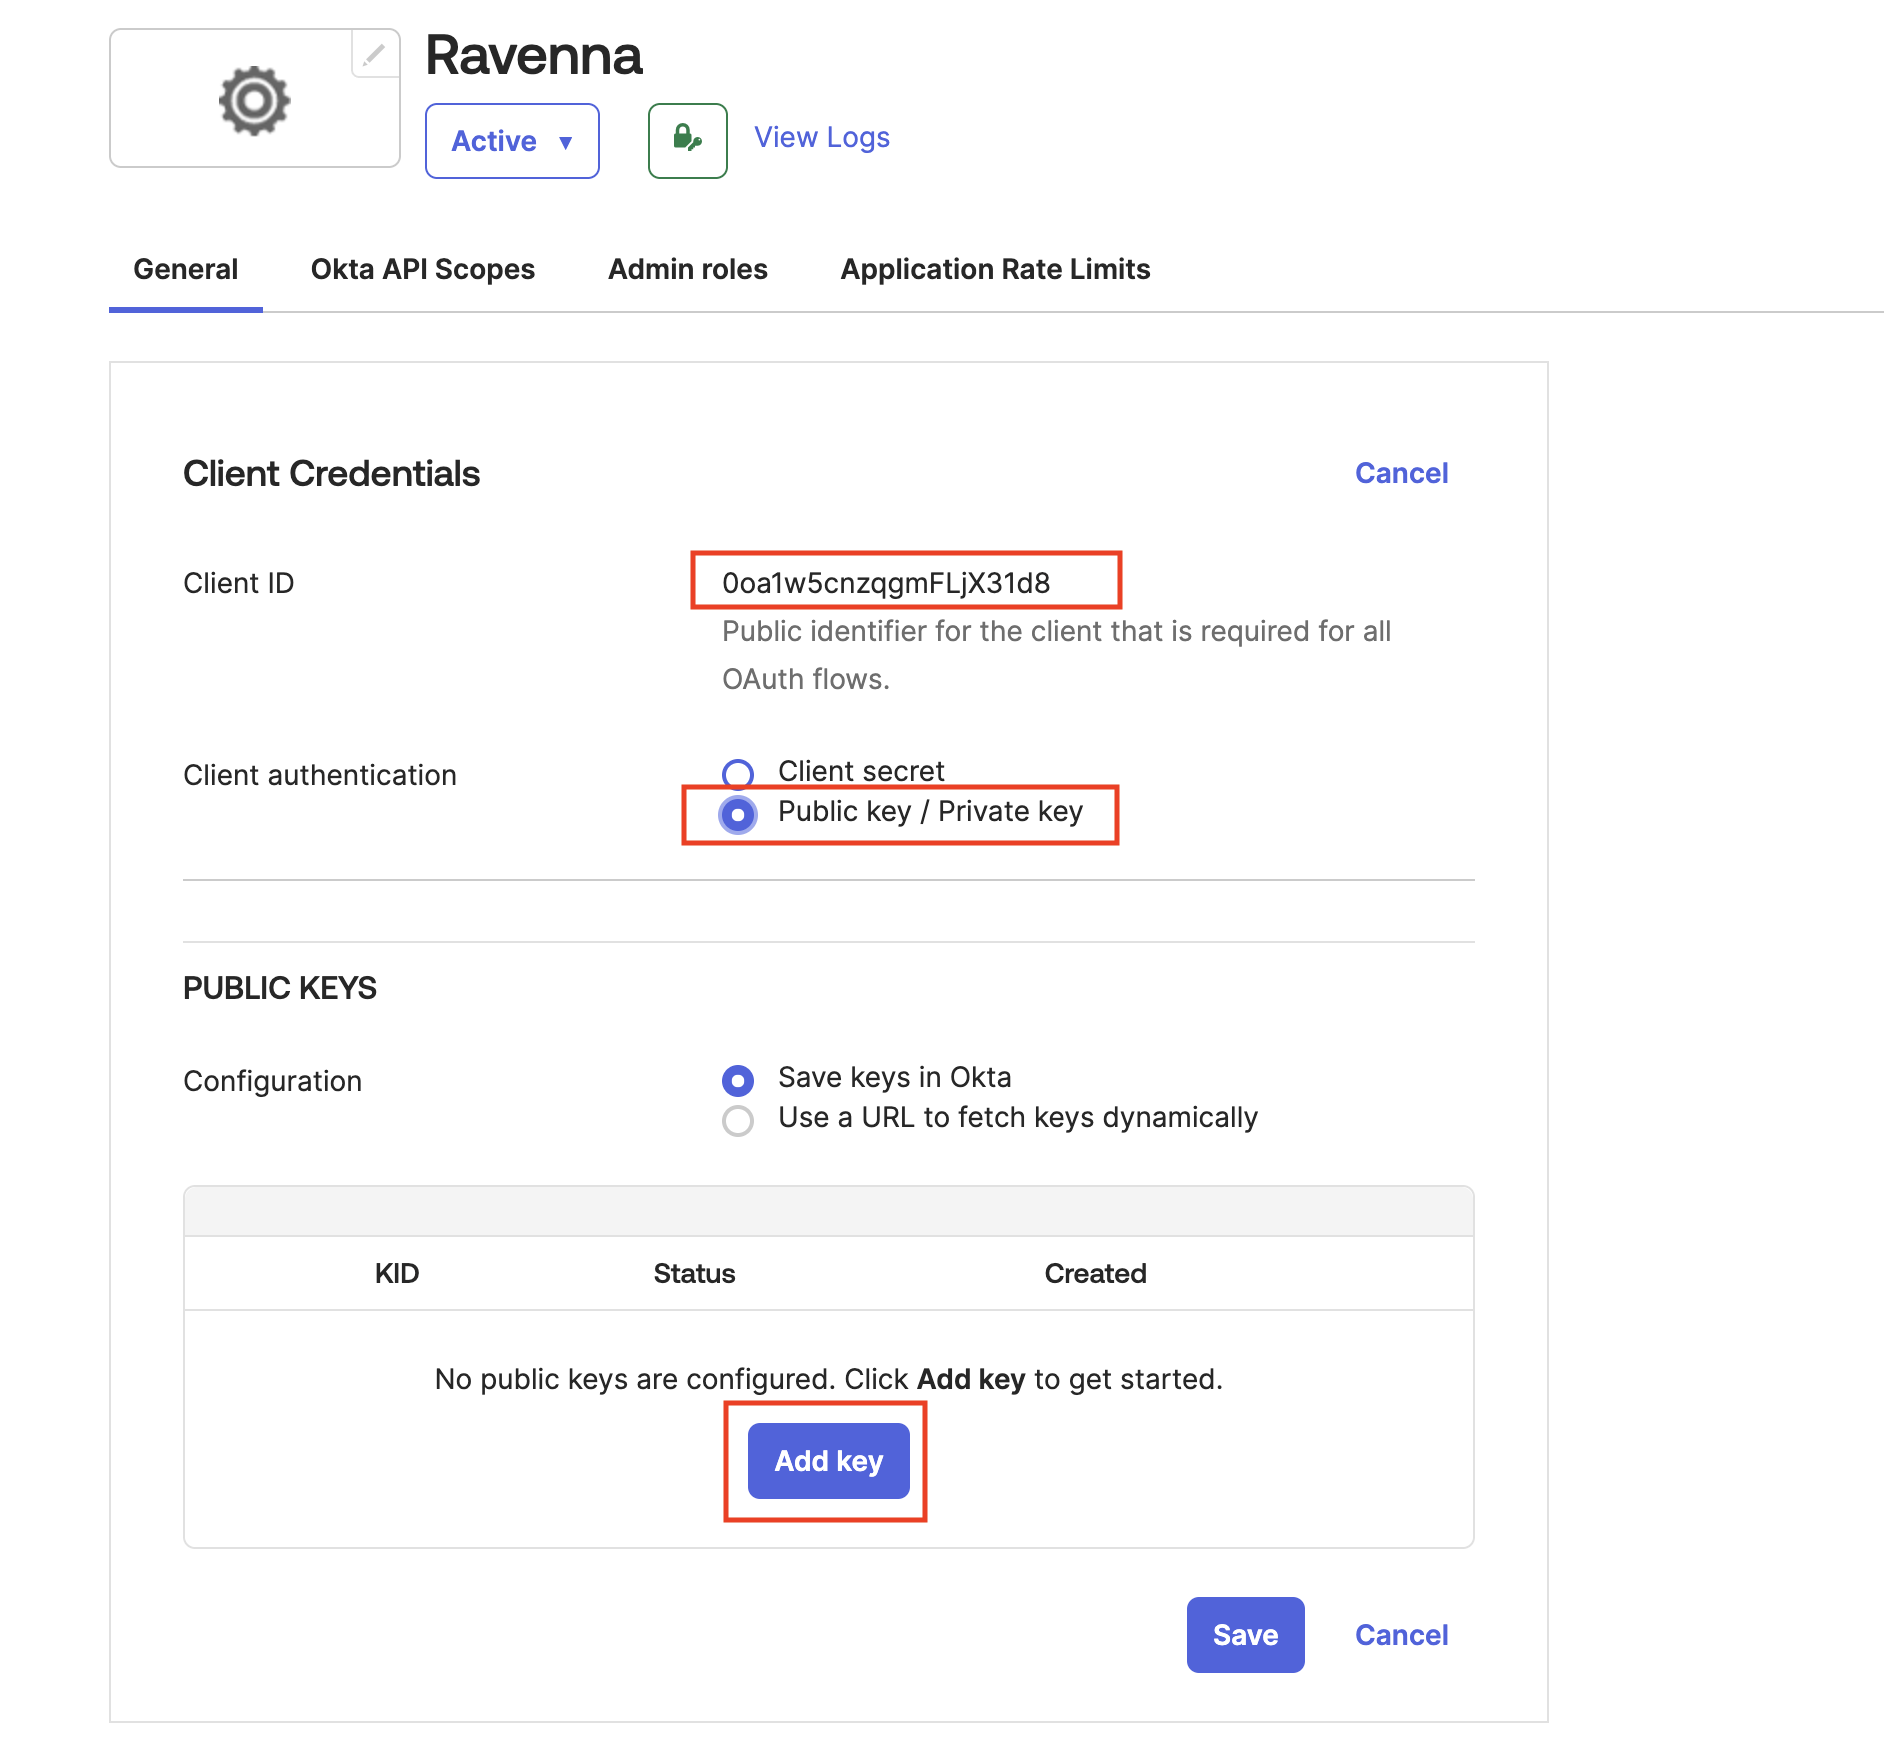
Configure the authentication method:
- Select Private Key/Public Key as the Client Authentication Method
- Click Add Key to generate a key pair
- Copy the Client ID for later use
5
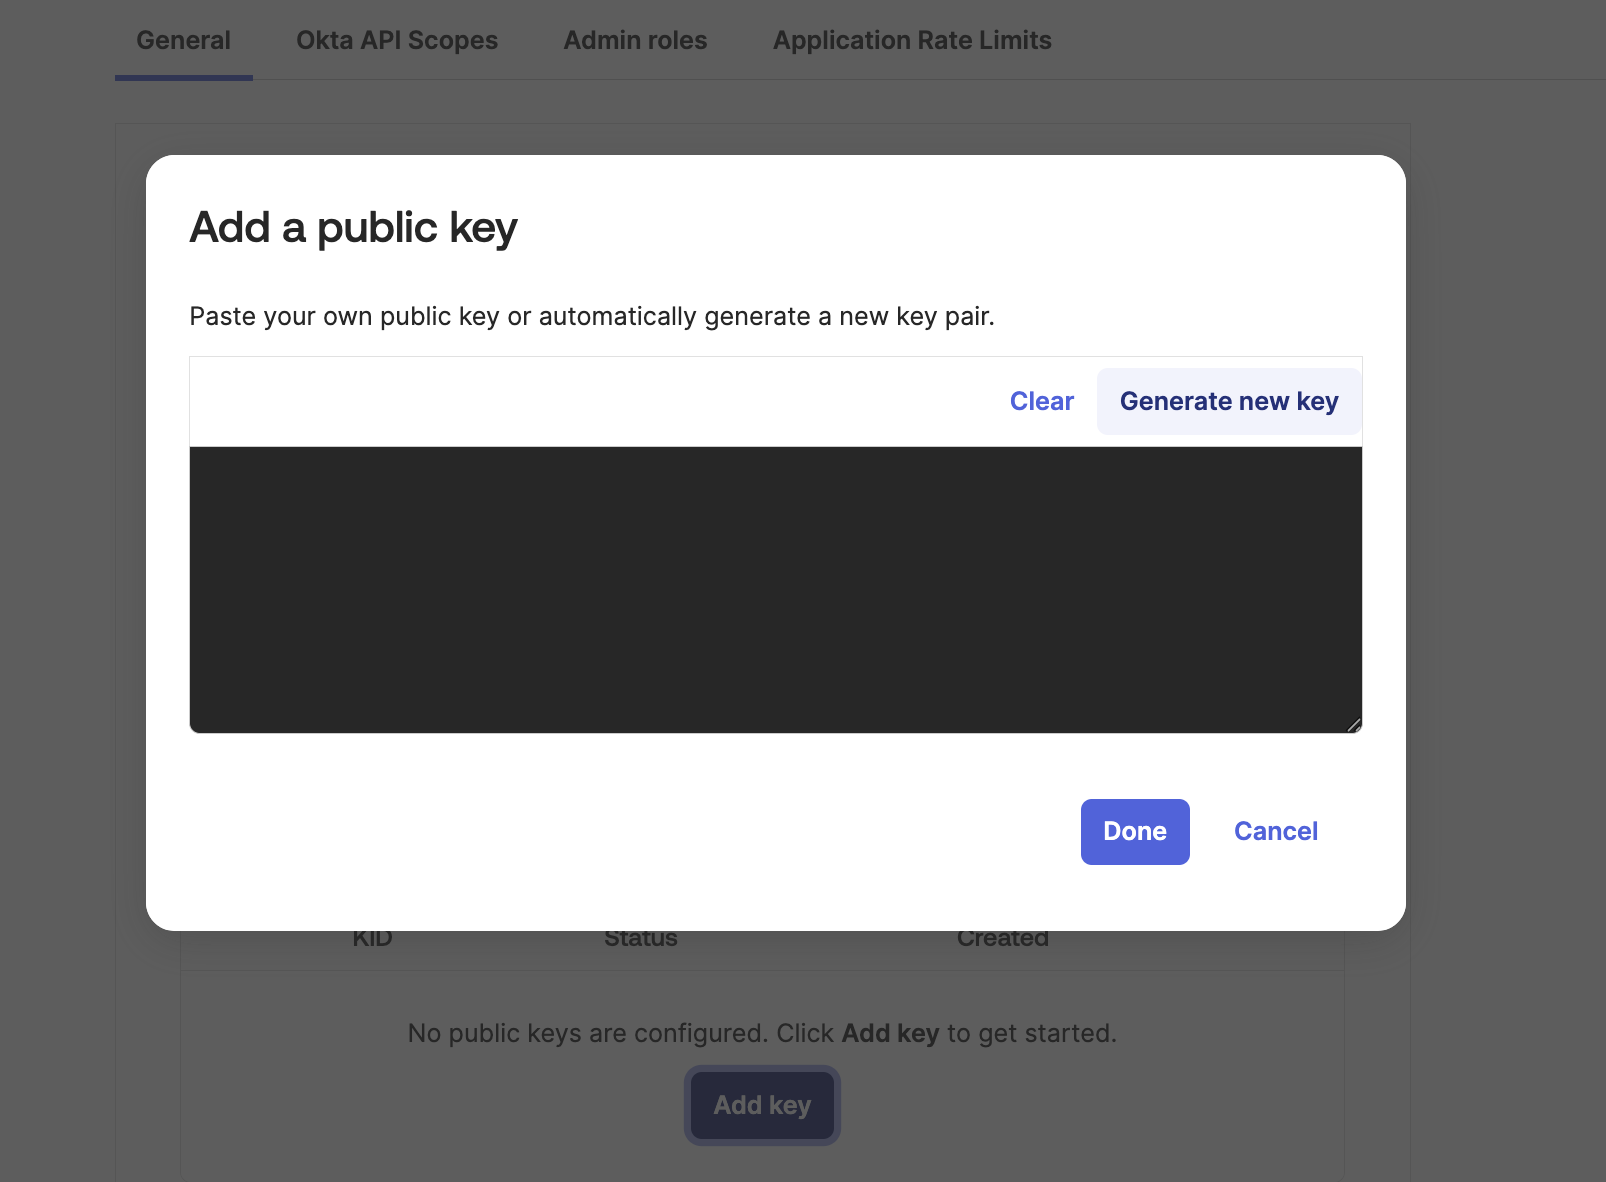
Generate PEM key pair
Generate a new PEM key pair for the integration
6
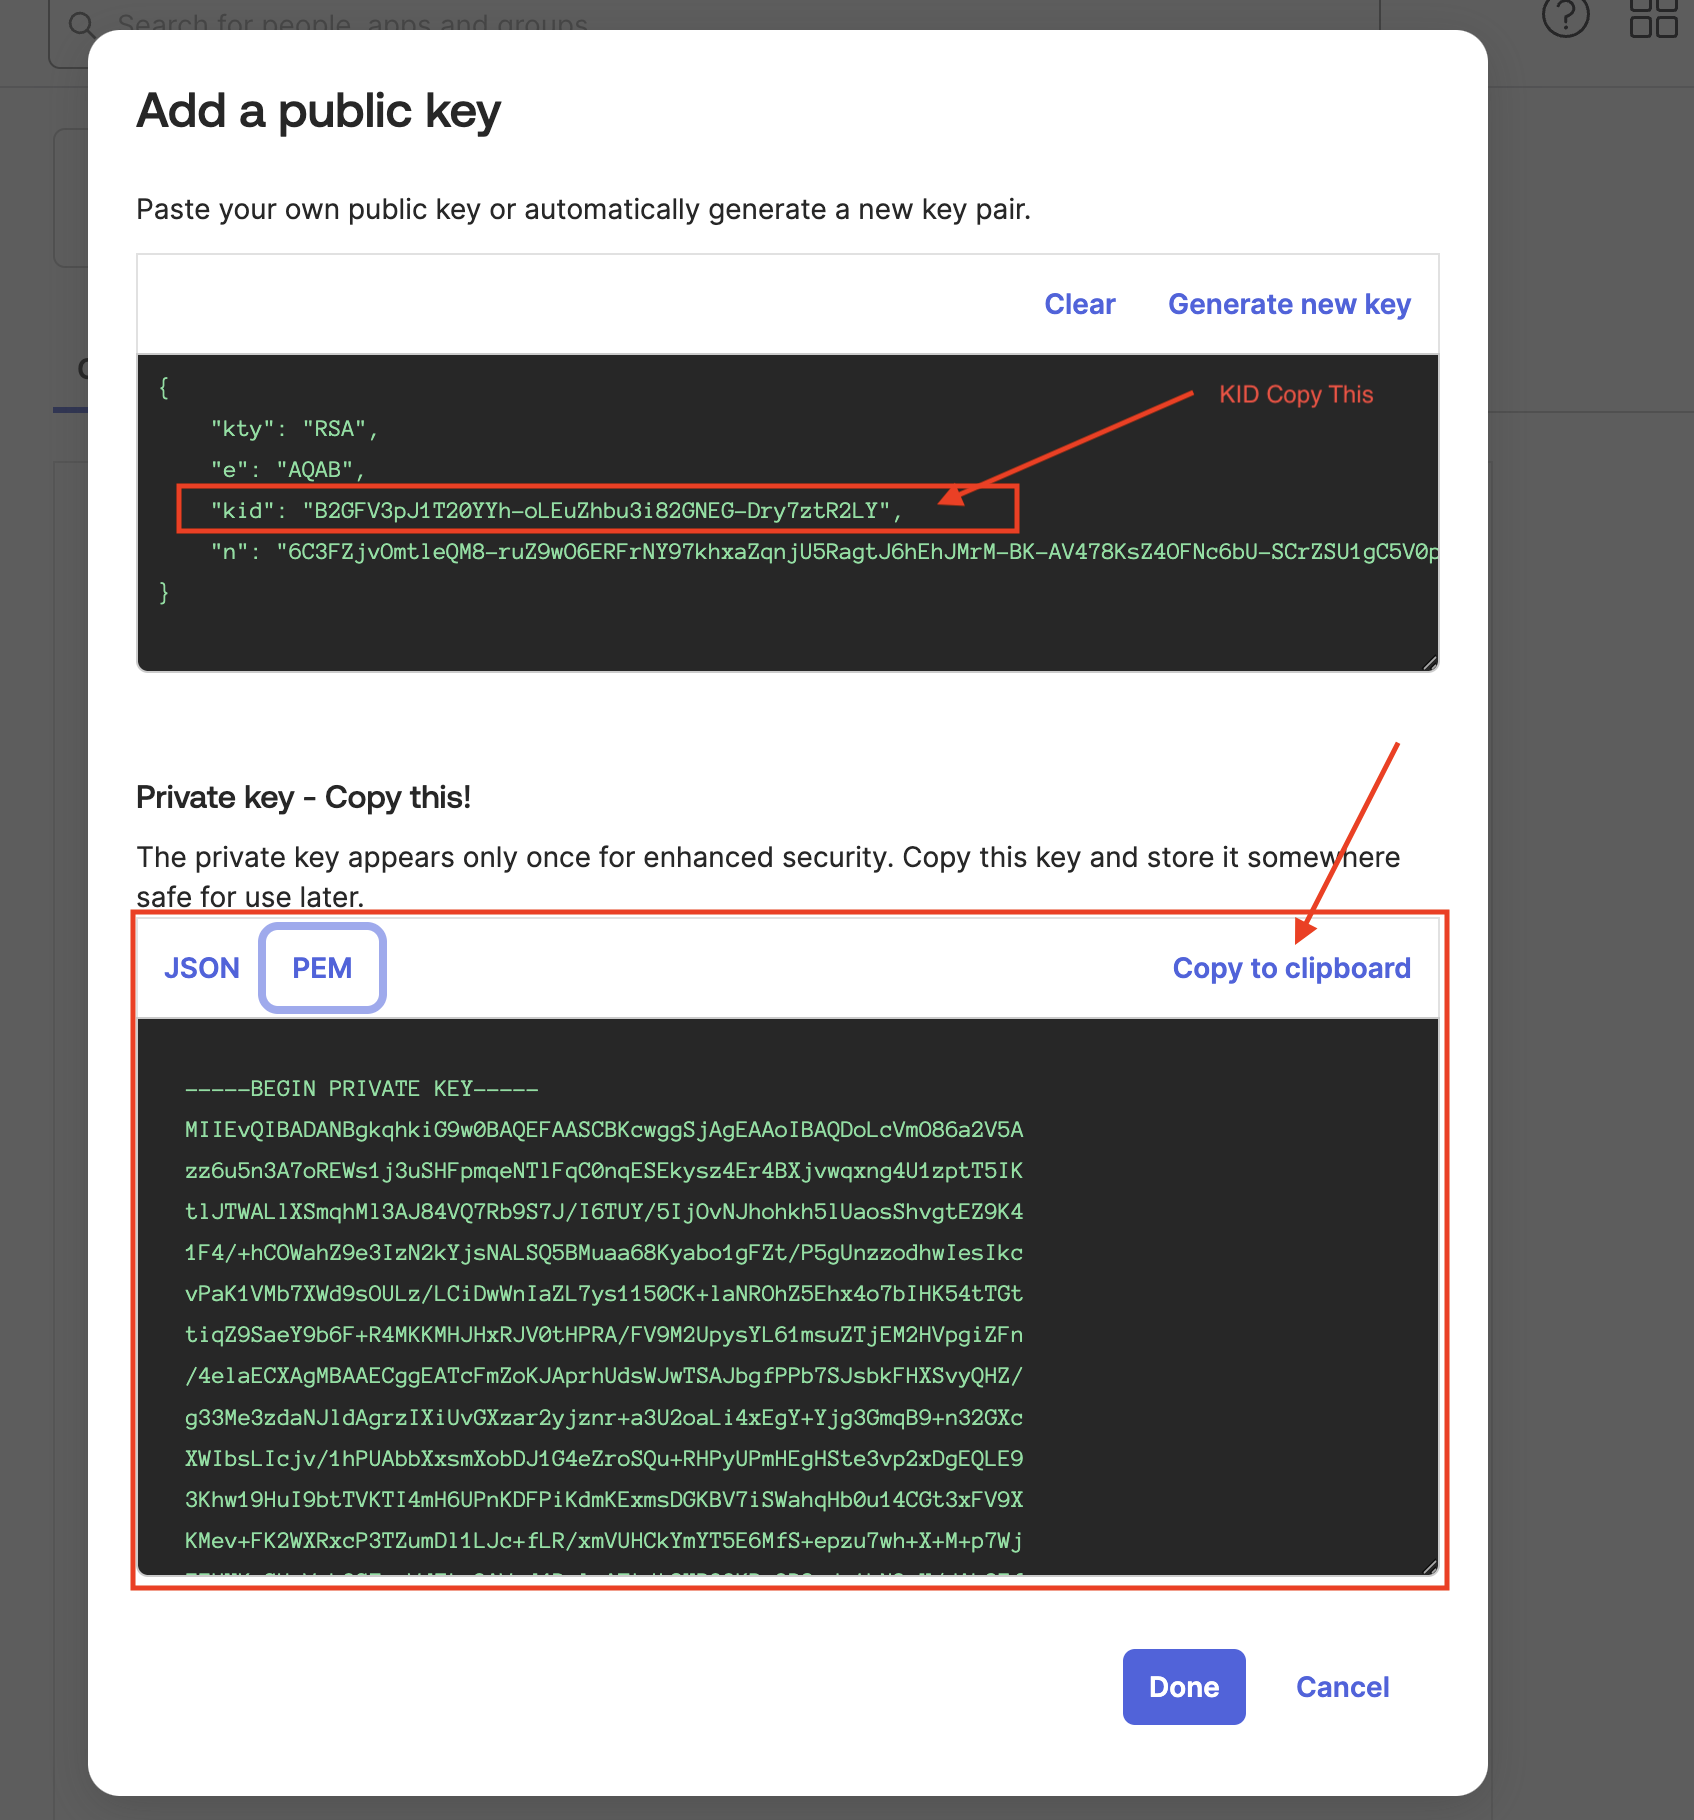
Save private key and KID
7
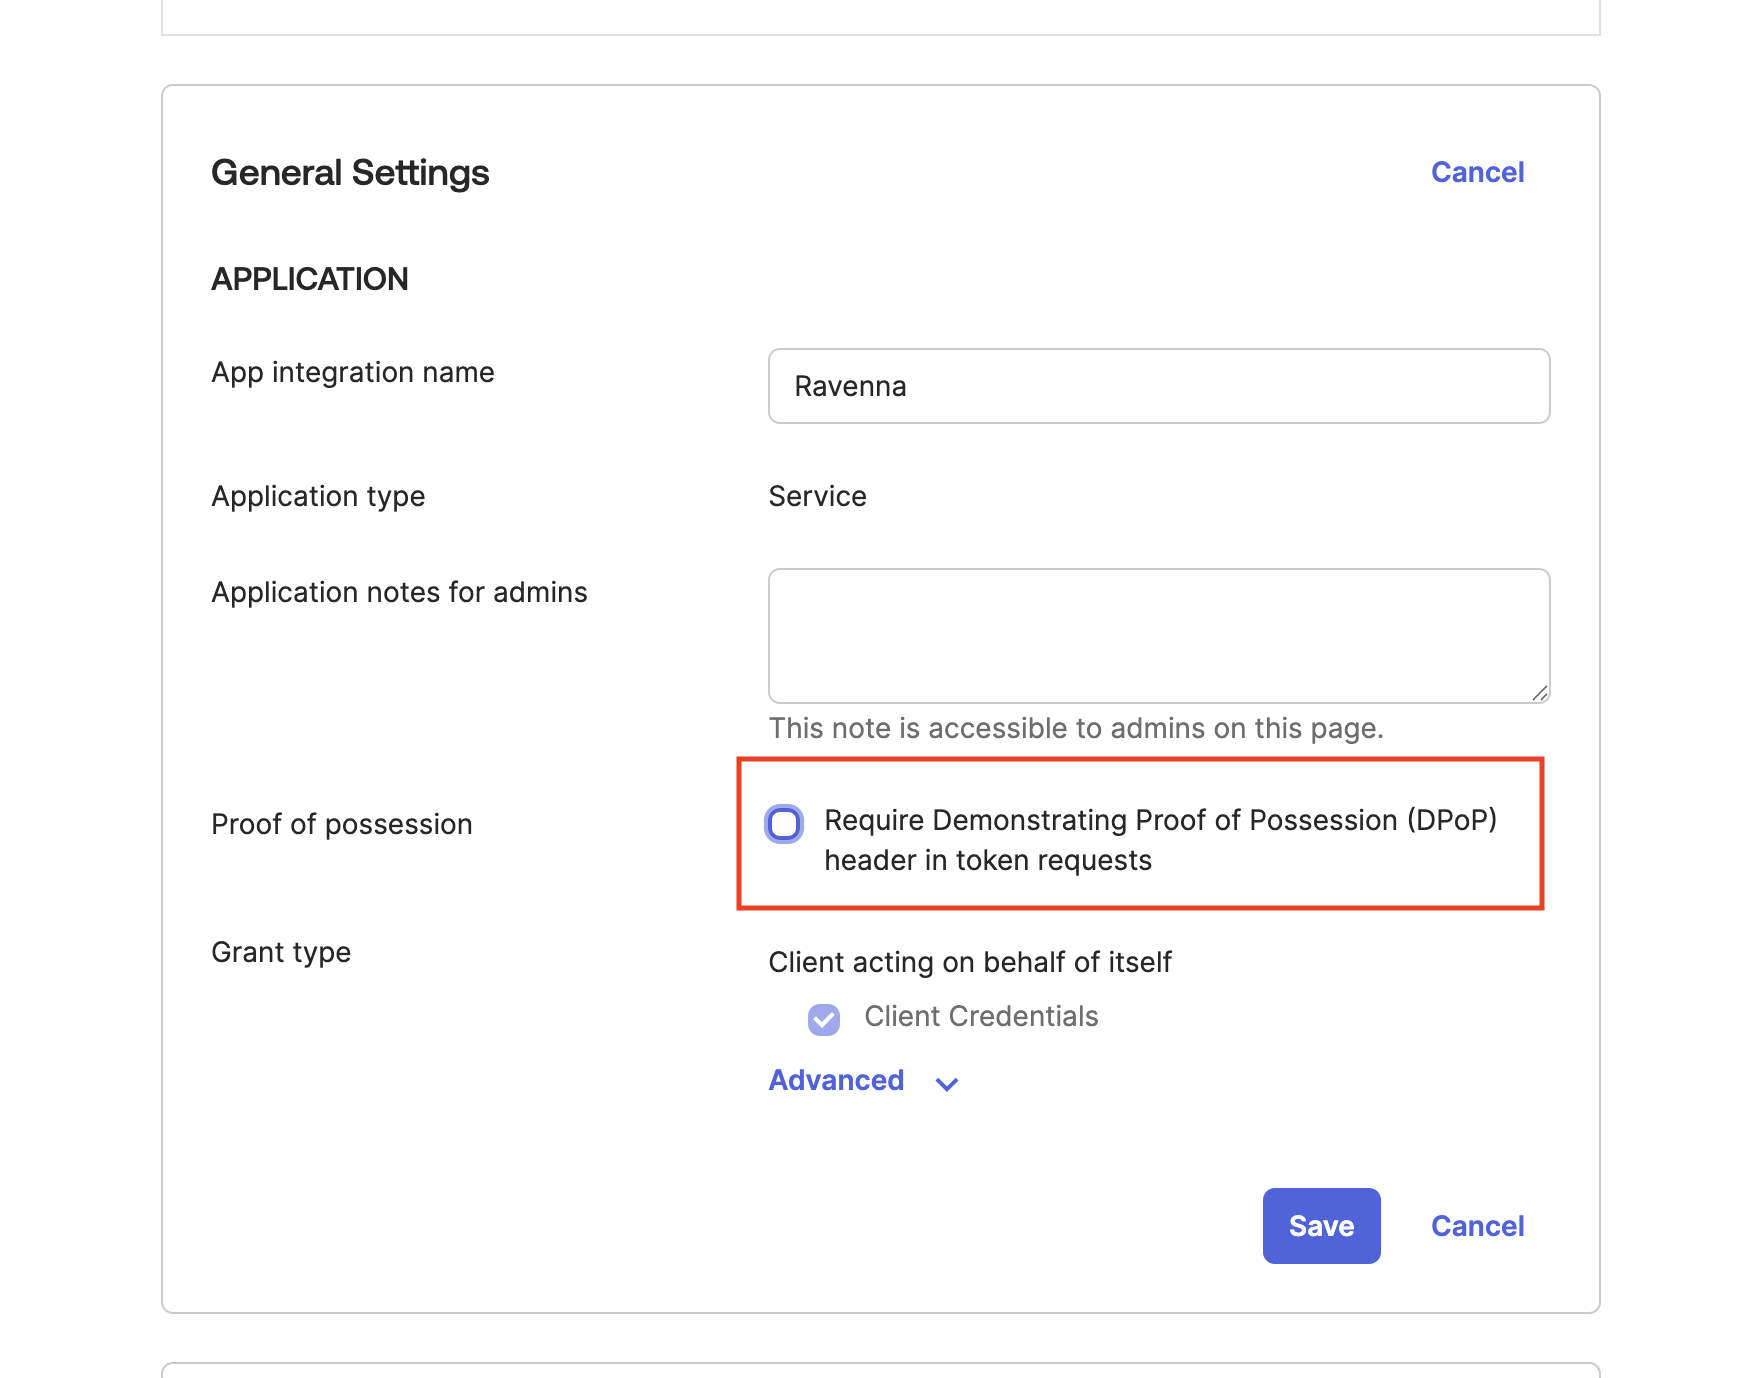
Disable DPoP requirement
Uncheck the Require DPoP option to ensure compatibility
8
Grant required scopes
Scopes are granted in the Okta Admin Console, not in Ravenna. In Okta, open your app under Applications > Applications, go to the Okta API Scopes tab, and grant the following scopes: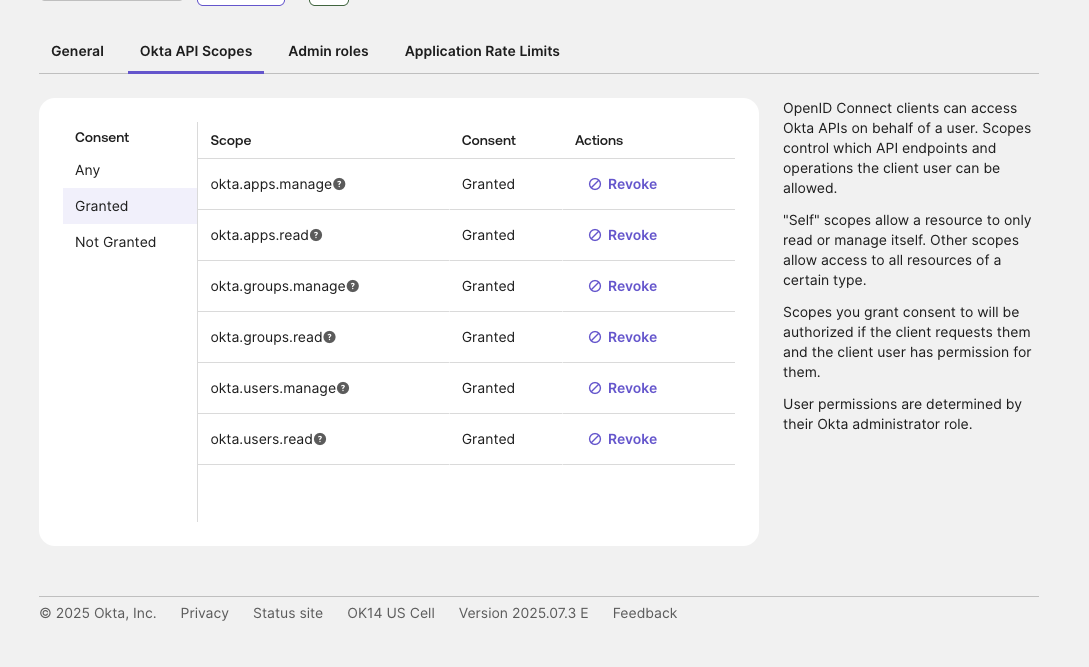
okta.users.readokta.users.manageokta.groups.readokta.groups.manageokta.apps.readokta.apps.manageokta.factors.readokta.factors.manageokta.logs.read(required for the copilot to search the Okta System Log when diagnosing access issues, sign-in failures, and MFA events)
9
Assign admin roles
Grant the following admin roles to the integration:
Application AdministratorGroup AdministratorHelp Desk AdministratororSuper Administrator(required for password and MFA reset)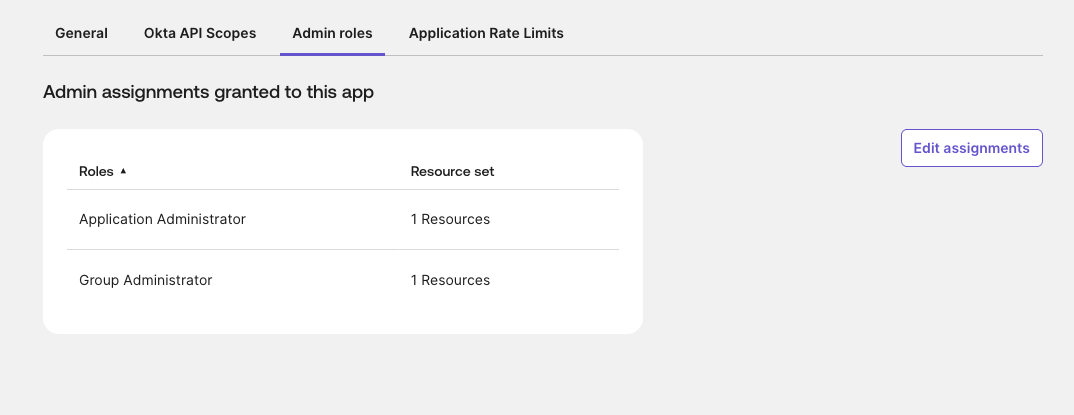
Add integration
1
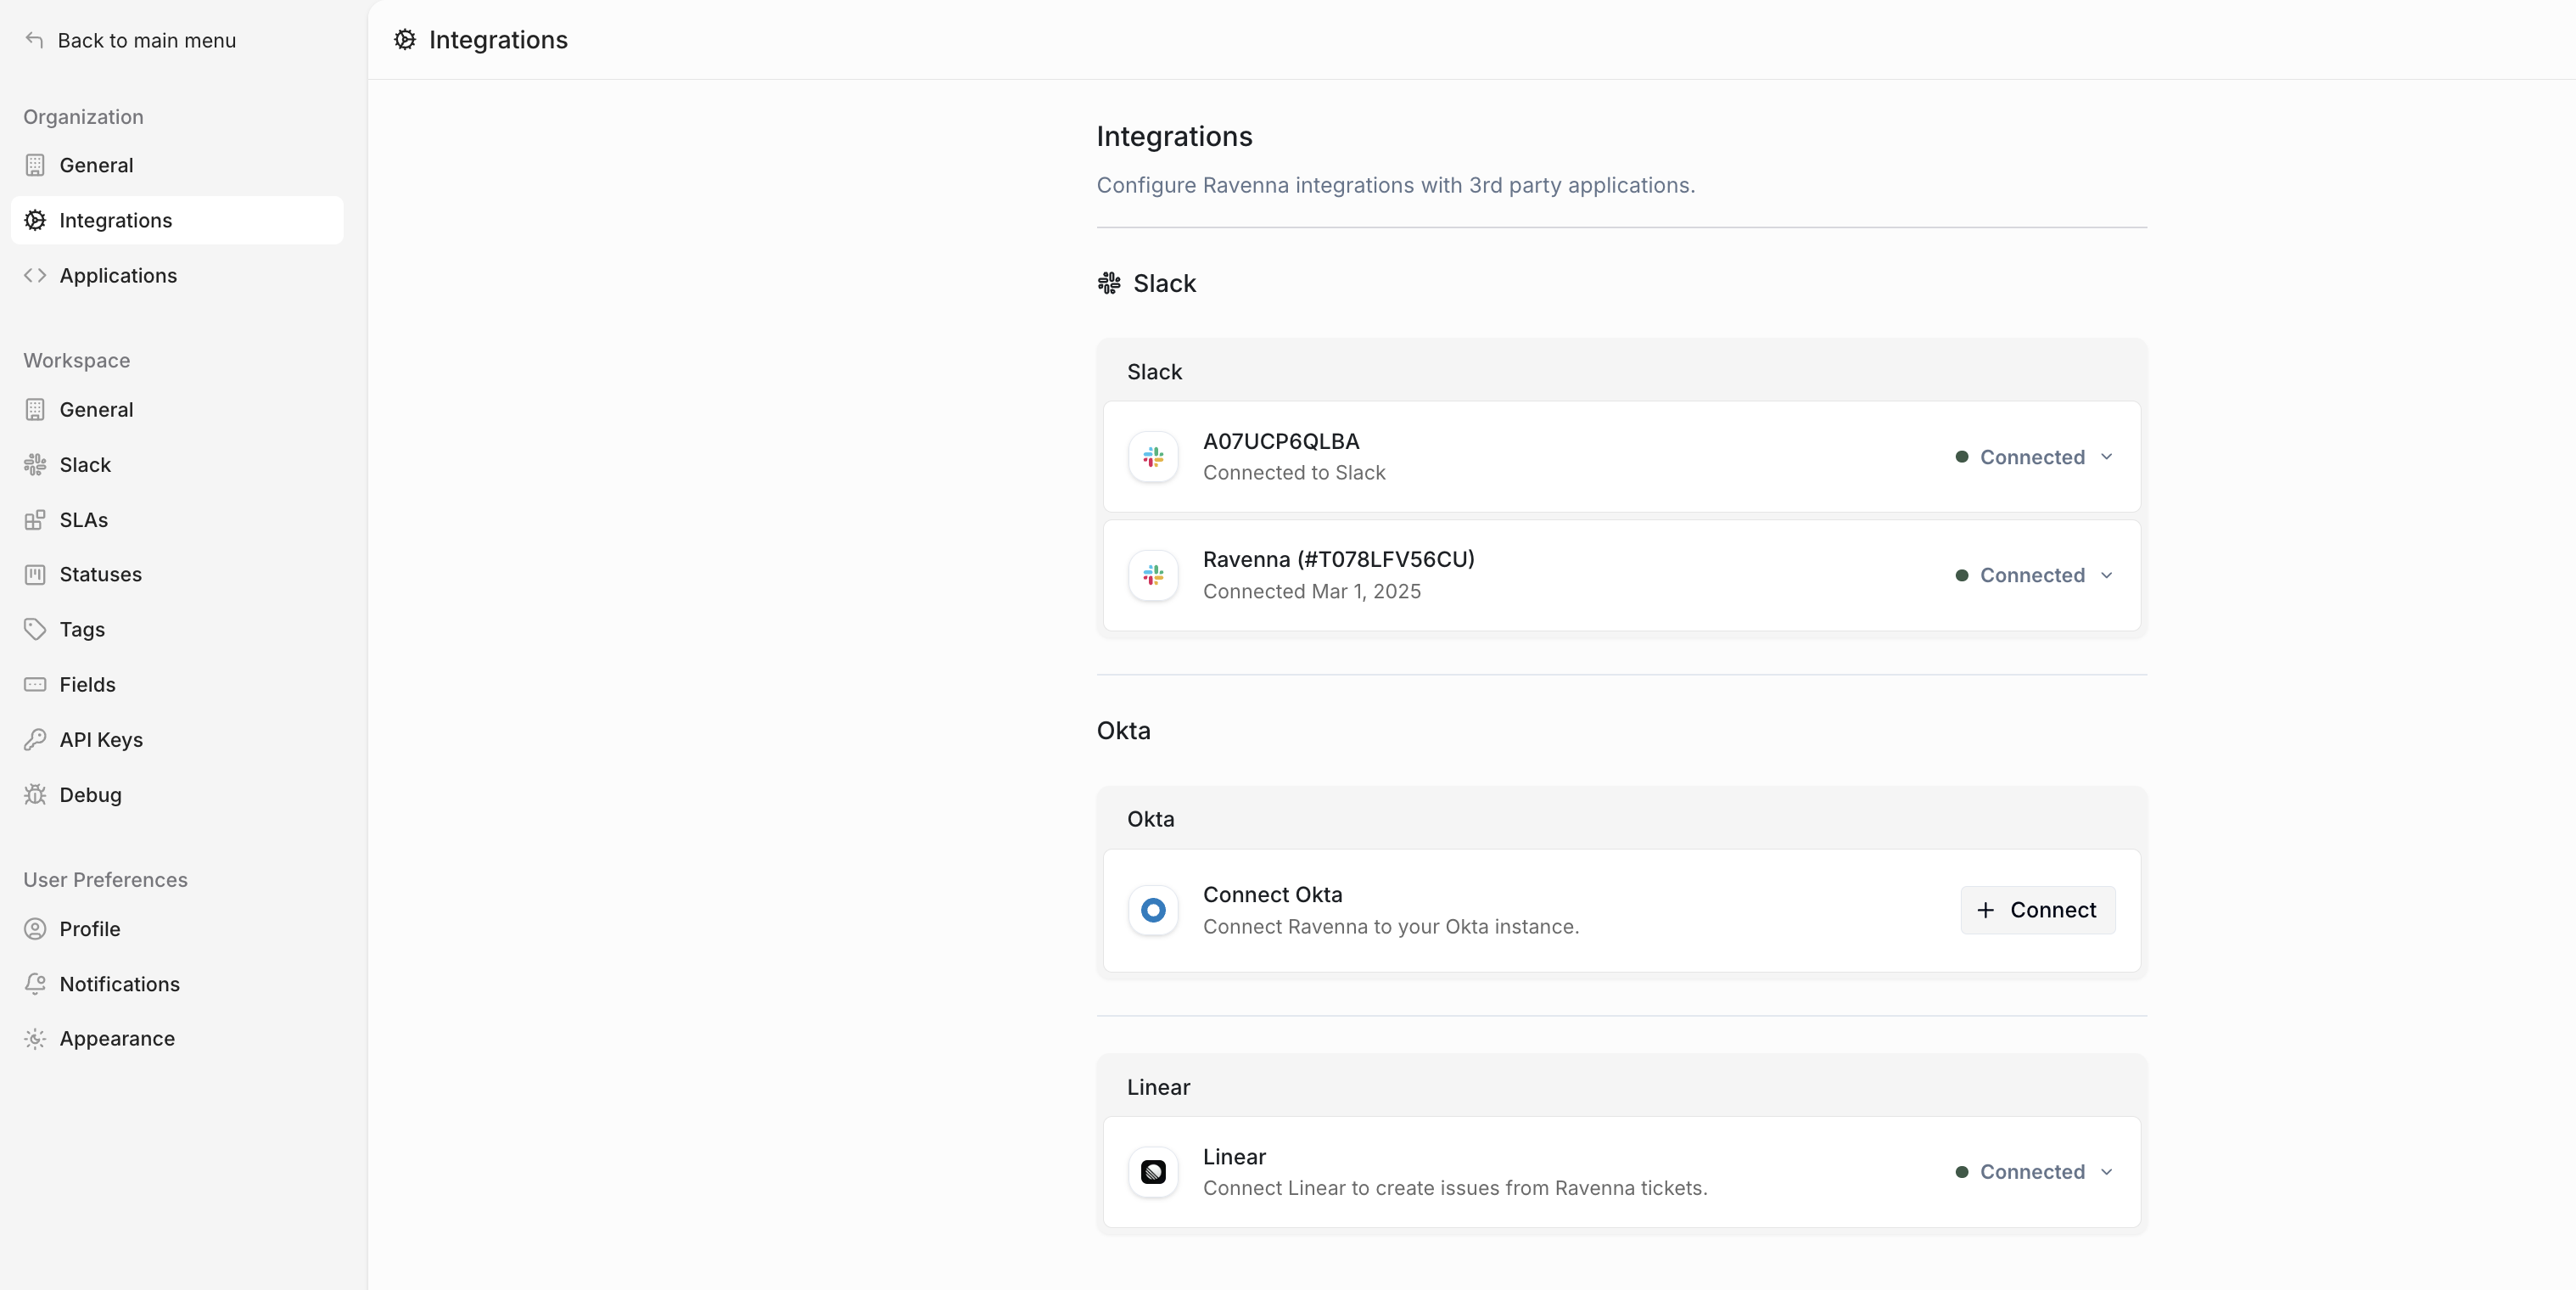
Navigate to integrations
Go to Settings > Integrations
2
Select Okta integration
Select Okta from the available integrations
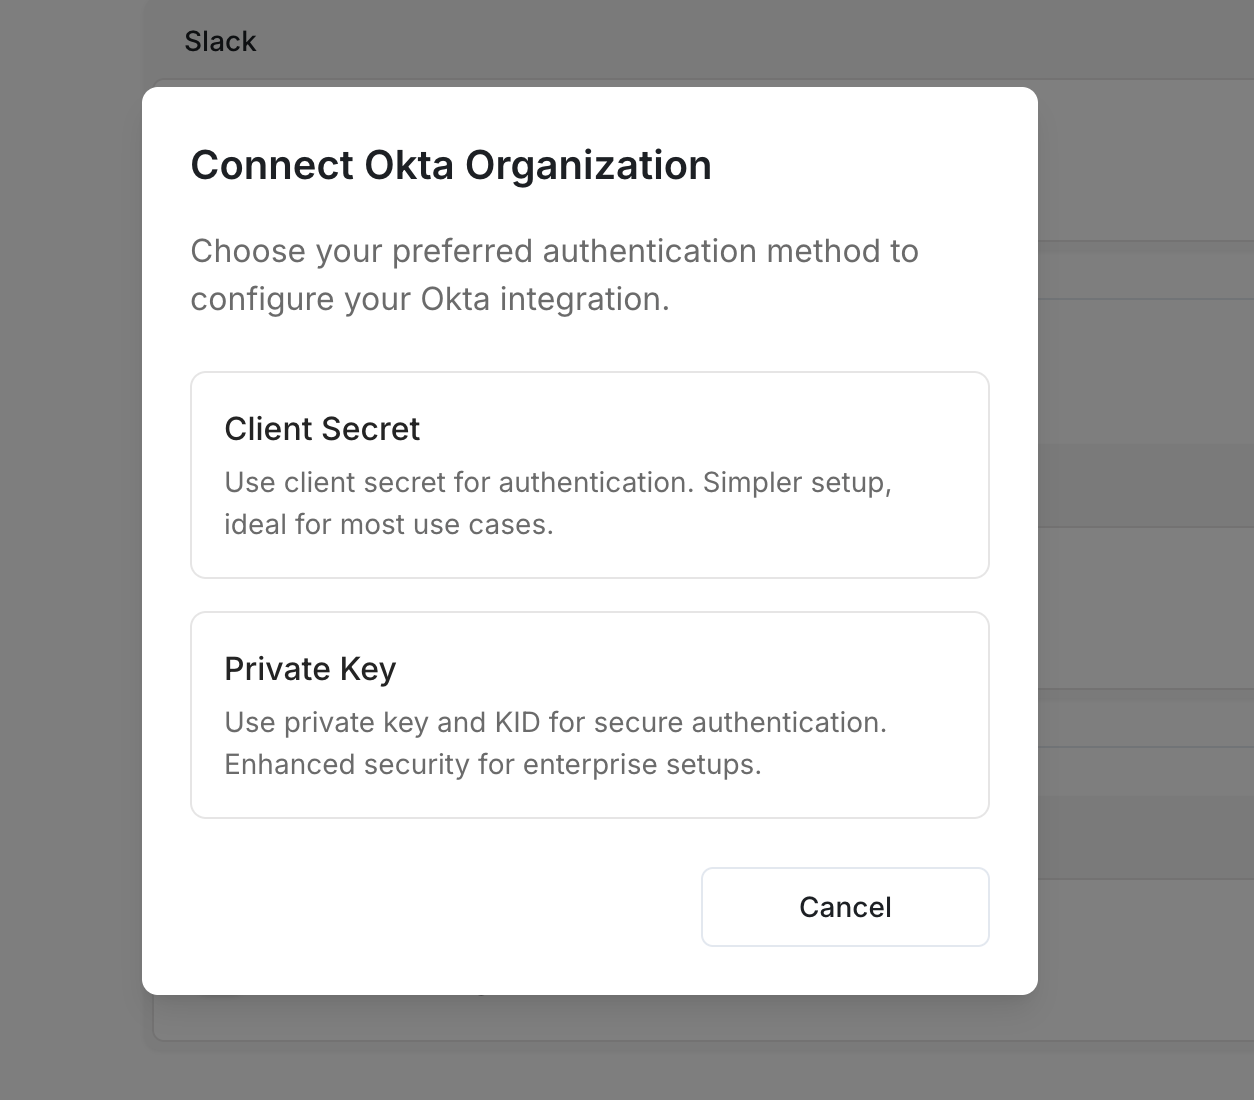
3
Select Private Key method
Select Private Key as your authentication method
4
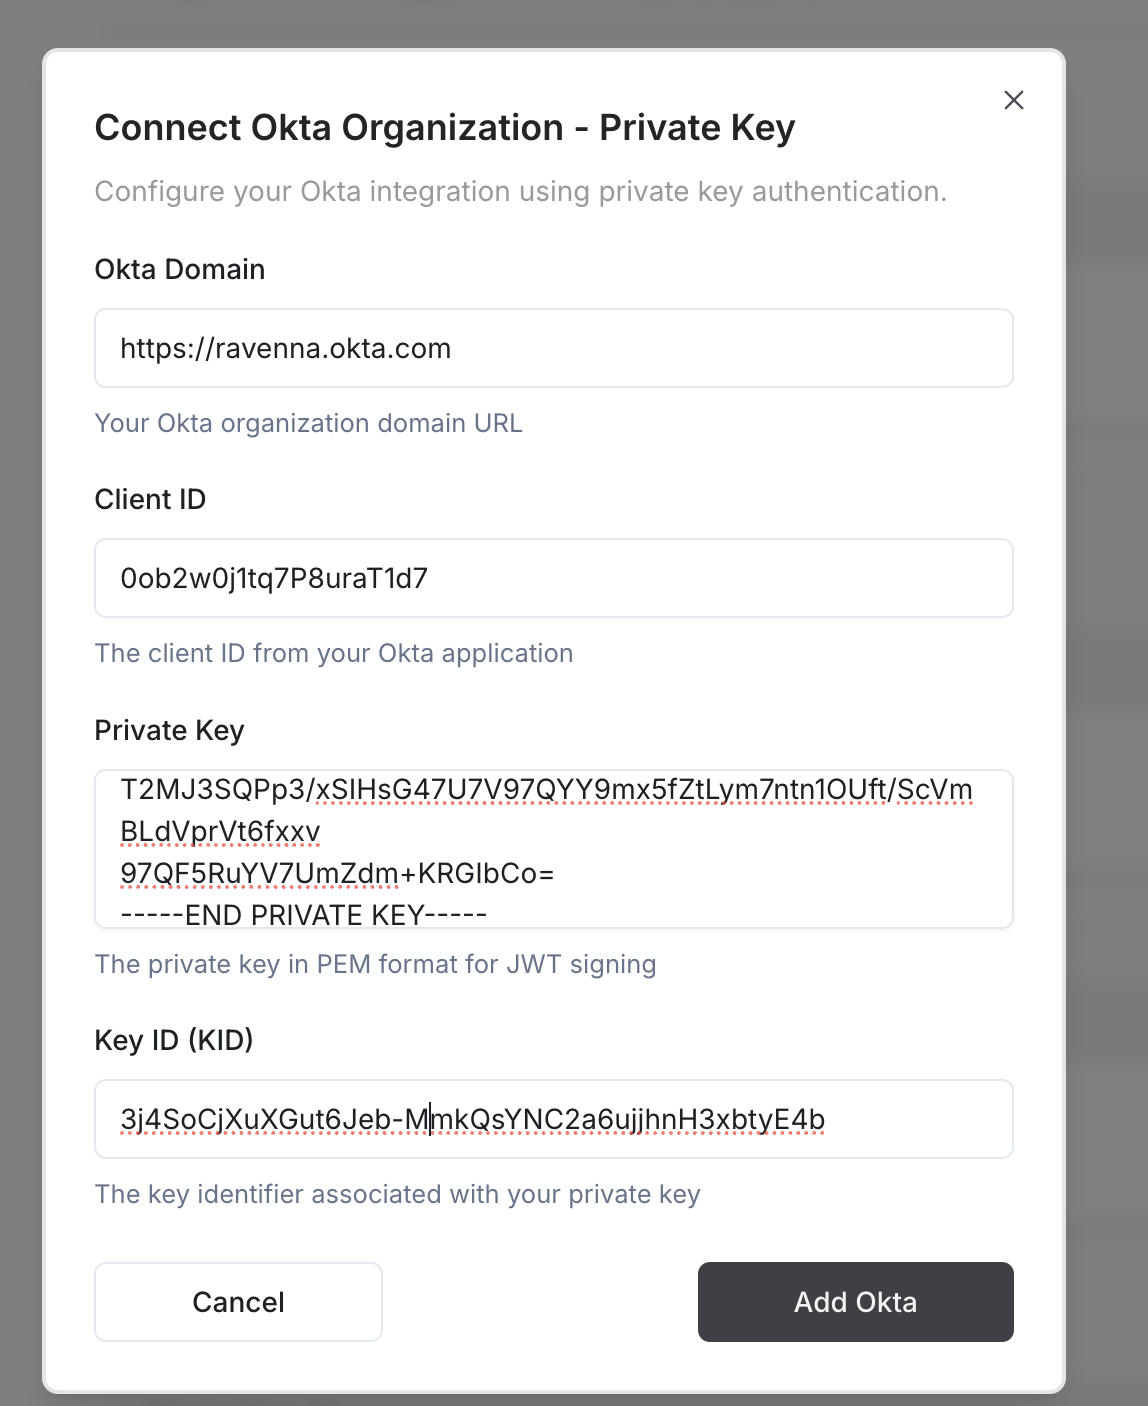
Enter integration details
Provide the following information from your Okta setup:
- Okta Domain: Your Okta domain (e.g.,
https://your-org.okta.com) - Client ID: The Client ID from your Okta integration
- Private Key PEM: The Private Key PEM you saved earlier
- KID: The Key Identifier (KID) you saved earlier
5
Complete setup
Click Add Okta to complete the integration setup
Troubleshooting
Invalid credentials error
Invalid credentials error
Cause: Private key or KID is incorrectSolution:
- Verify the Private Key PEM is copied correctly (including BEGIN/END markers)
- Ensure the KID matches the key in Okta
- Check that the key hasn’t been deleted in Okta
- Try generating a new key pair if needed
Missing scopes or partial sync
Missing scopes or partial sync
Cause: The integration was created with a subset of the required Okta API scopes or admin roles.Behavior: Ravenna no longer blocks integration setup when some scopes are missing. The integration is created with the scopes you granted, and any resource Ravenna can’t read (users, groups, or applications) syncs as empty until the missing scope is added.Solution:
- Verify all required scopes are granted in the Okta Admin Console on your app’s Okta API Scopes tab. Ravenna does not display granted scopes.
- Check that Application Administrator role is assigned
- Ensure Group Administrator role is assigned
- For password and MFA reset, assign
Help Desk AdministratororSuper Administrator - Review the integration’s admin role assignments
- After granting the missing scopes, trigger a resync from the integration page (no need to disconnect and reconnect)
Password or MFA reset fails with a permission error (403)
Password or MFA reset fails with a permission error (403)
Cause: Okta enforces credential reset through admin roles, separately from API scopes, so the integration can have every scope and still be blocked.
Application Administrator and Group Administrator cannot reset credentials.Solution:- Assign
Help Desk AdministratororSuper Administratorto the integration - Retry the action; no resync or reconnect is needed
DPoP requirement error
DPoP requirement error
Cause: DPoP (Demonstrating Proof-of-Possession) is enabledSolution:
- Disable Require DPoP in the Okta integration settings
- Save the changes and retry the connection
Key validation failed
Key validation failed
Cause: Private key format is incorrectSolution:
- Ensure the key is in PEM format
- Verify the key includes the full BEGIN/END markers
- Check for any line breaks or formatting issues
- Generate a new key pair if the format is corrupted
Features
Once connected, you can use Okta actions in workflows:Okta Actions
Manage user group memberships, assign applications, and check group membership for access management