What applications provide
Application catalog
Access level definitions
Approval configuration
Identity provider integration
Setting up applications
Create application entries to represent the tools and services your organization uses.Navigate to applications
Add application
Fill basic information
- Name: Display name for the application
- Domain: The application’s web domain (optional)
- Details: Rich text notes about the application (optional). These details appear in hover cards when users view the application in ticket custom fields.
- Owner: User or user group responsible for managing this application. Selecting a group lets the entire group act as the owner for routing and fallback purposes.
- Approver: User or user group responsible for approving access requests for this application. Used by access levels and approval templates that route to the “Application Approver” role. When a group is selected, every member of the group is treated as an approver. If no approver is set, the application owner is used as a fallback.
- Post Provisioning Message: Optional rich text message sent to the requester after access has been granted. See Post provisioning message for details.
- Workspaces: Select which workspaces can surface this application via request forms
Configure access levels
Save application
Customizing synced application names
Applications synced from identity providers (Okta, Google Workspace, Microsoft Entra ID) use the integration’s application name by default. You can set a custom display name to make applications easier to identify for your users.Open the synced application
Edit the application
Set a display name
Save changes
- The application appears as Display Name (Original Name) throughout the platform
- The original integration name is preserved for reference and syncing
- Clearing the display name reverts to showing only the original name
Post provisioning message
Set a custom message that’s sent to the requester on the ticket once their access has been provisioned. Use it to share login instructions, links to documentation, onboarding resources, or any other context specific to that application.When set, the post provisioning message replaces the default confirmation text on the ticket for both fully provisioned and partially provisioned access requests. When left blank, Ravenna uses the default messages.When to use it
Share login instructions
Link to onboarding resources
Set expectations
Highlight support contacts
Configure the message
Open the application
Edit the post provisioning message
Save the application
Default messages
If no post provisioning message is configured, Ravenna posts one of the following on the ticket:Exporting applications
Export your application catalog to a CSV file for reporting, audits, or backup. The export mirrors the list you currently see in Settings > Applications, so any search, sort, or filter you apply is reflected in the file.When to export
Audit and compliance
Reporting
Catalog review
Backups
Export the catalog
Open applications
Filter the list (optional)
Export
applications-export-<date>.csv.What’s included
Each row in the CSV represents one application. The export resolves user, group, workspace, and access-level references to human-readable names.Archiving applications
Archive applications you no longer want users to request access to without losing their configuration or breaking historical tickets. Archived applications are hidden from request forms and the application catalog by default, but their access levels and approval history remain intact for audit purposes.When to archive
Decommissioned tools
Replaced applications
Seasonal access
Cleanup
Archive an application
Open the application
Archive the application
Unarchive an application
Show archived applications
Open the archived application
Unarchive the application
Status and visibility
Deleting applications
Delete an application when you want to permanently remove it from your catalog. Unlike archiving, deletion is irreversible and removes the application from Ravenna entirely.When to delete versus archive
Delete
Archive
Delete an application
Open the application
Delete the application
Confirm deletion
Access levels
Access levels define the different permission tiers available within an application. Each access level represents a specific set of capabilities users can be granted.Why use access levels?
Access levels help organizations implement least-privilege access by allowing users to request only the permissions they need for their role. This reduces security risk while maintaining operational efficiency.Model real permissions
Reduce over-provisioning
Streamline requests
Support compliance
Managing access levels
Access levels have a dedicated Access Levels tab on the application details page. Click any row in the table to edit that access level inline.Creating access levels
Open application settings
Add access level
Configure the level
- Name: Clear name indicating what this level grants (e.g., “Admin”, “Editor”, “Viewer”)
- Description: Detailed explanation of what permissions this level includes
- Assignment strategy: How approvers are assigned when users request this level
- Approvers: Who can approve requests for this access level
Map to identity provider groups (optional)
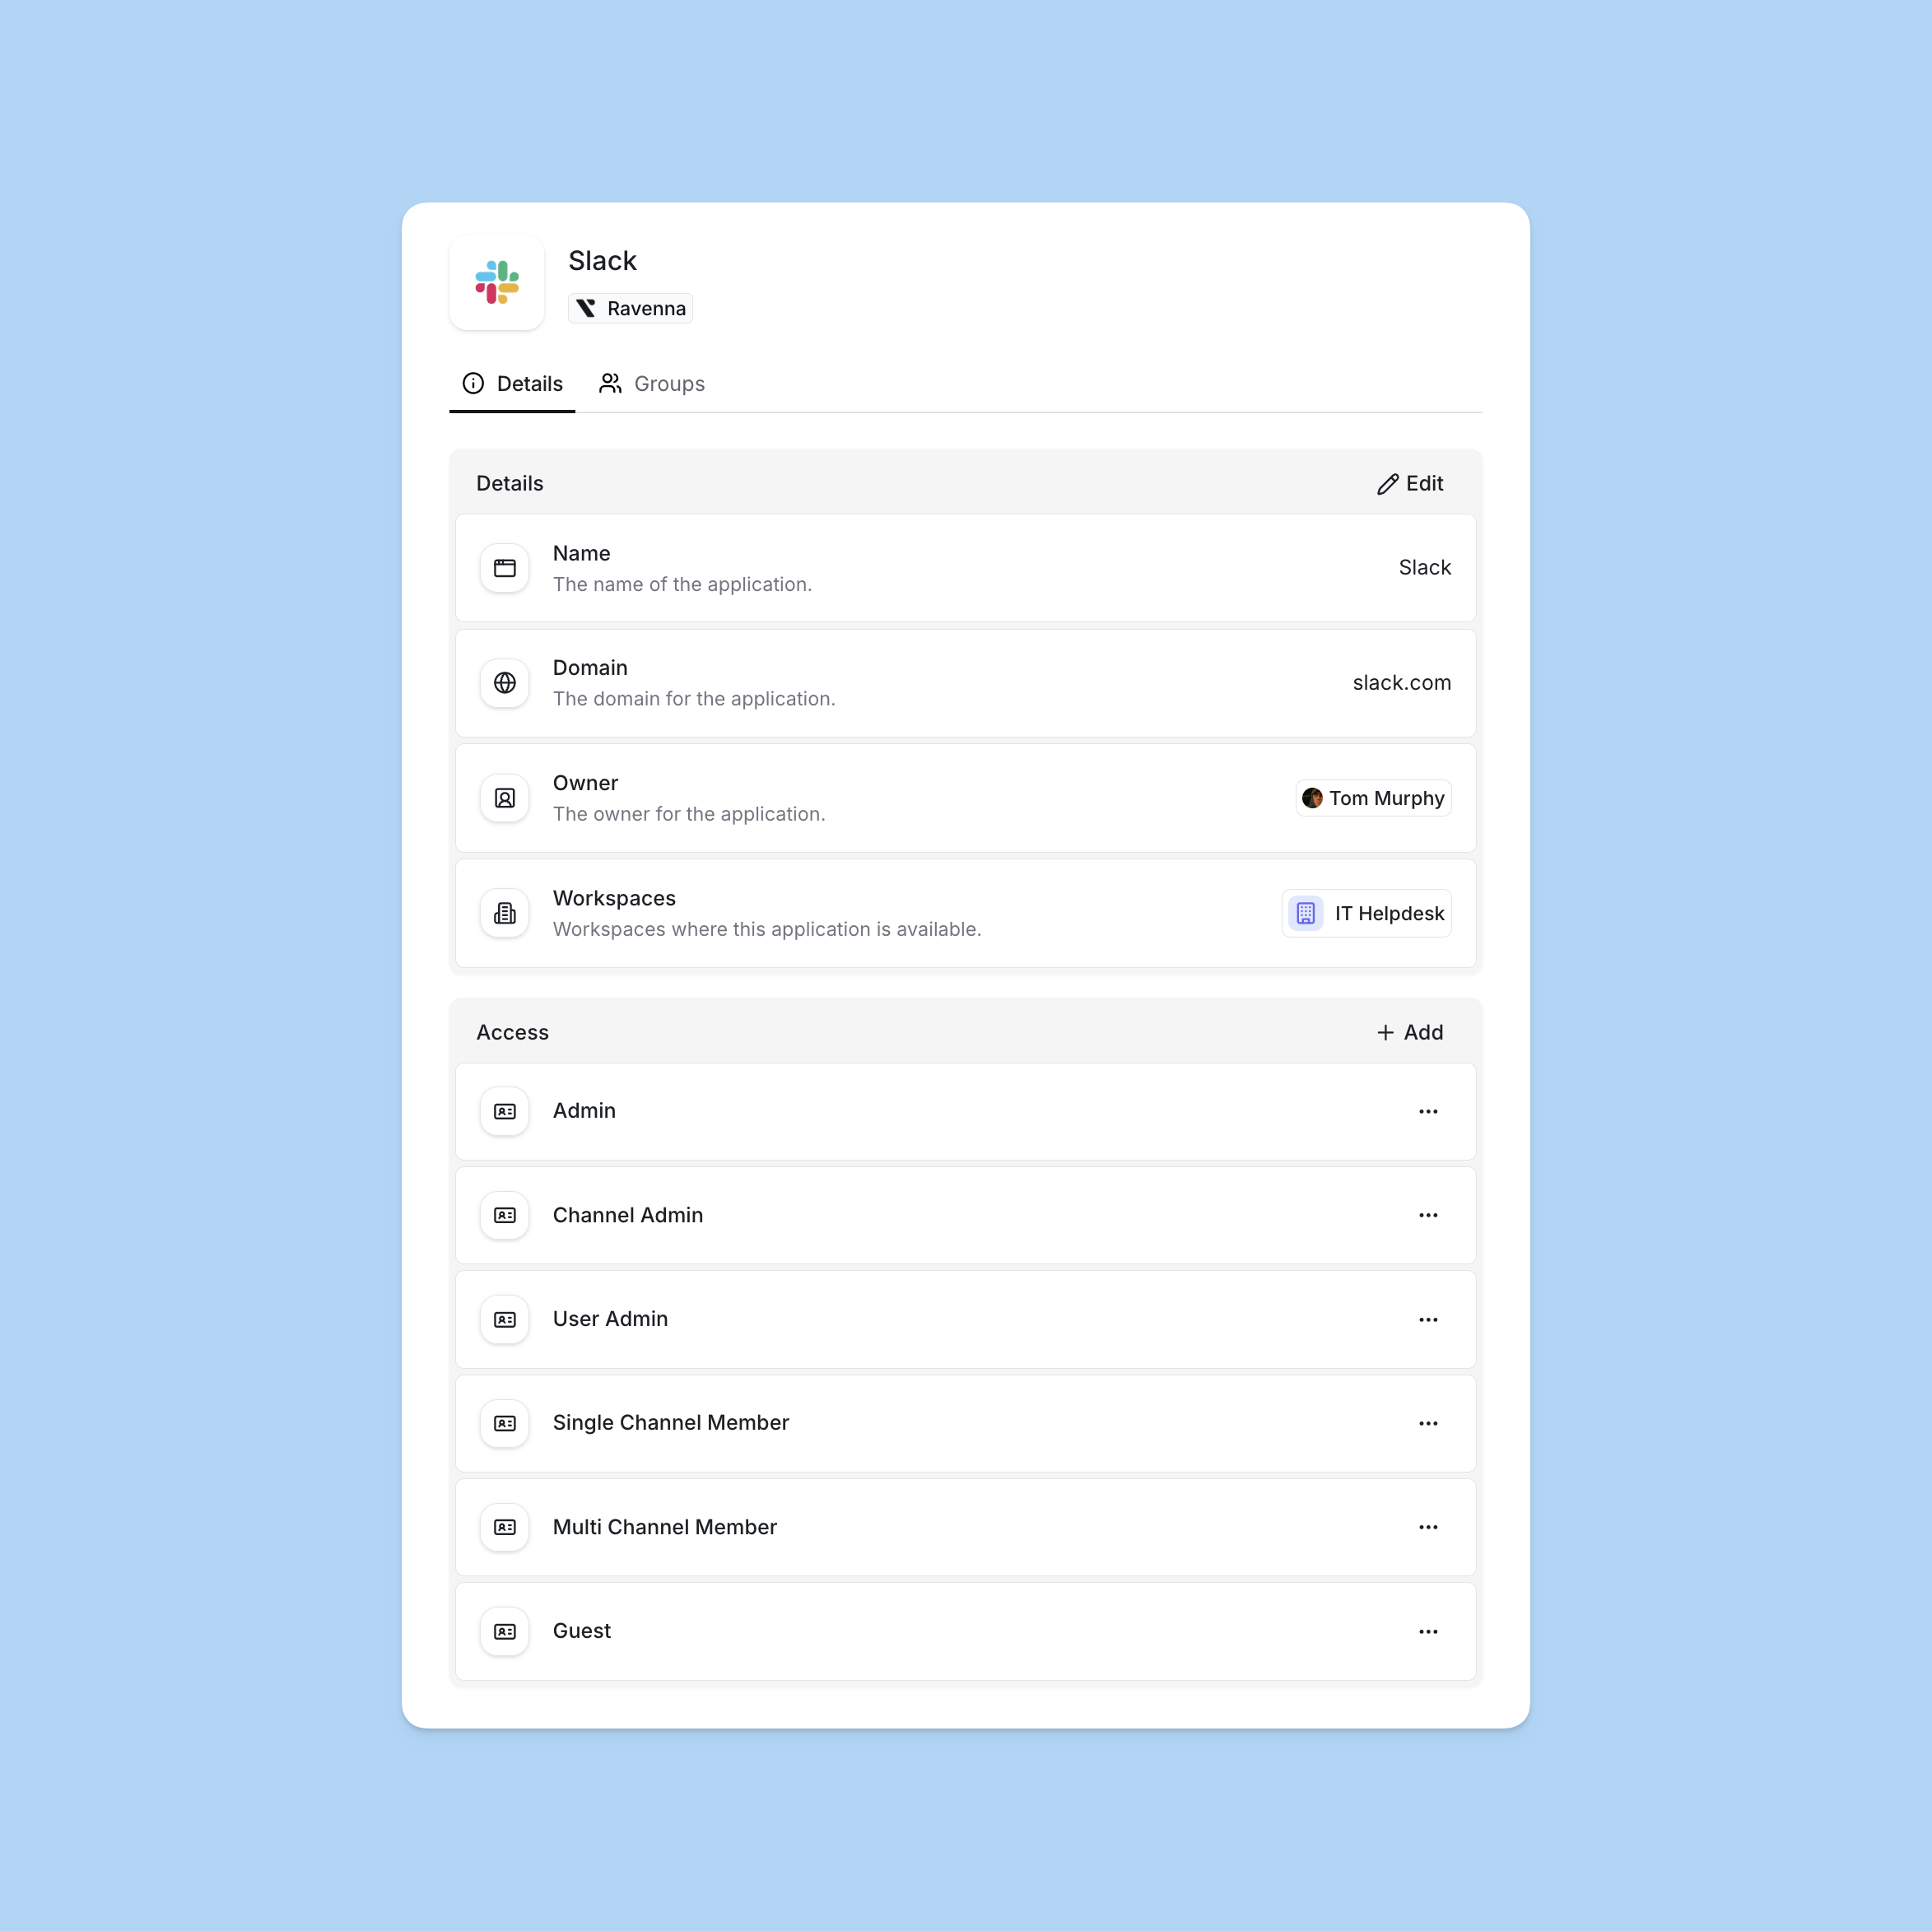
Example access level structure
Access levels should reflect how your organization actually uses each application. Here’s an example for Slack:Archiving access levels
Archive access levels you no longer want users to request without losing their configuration or breaking historical tickets. Archived access levels are hidden from request forms by default, but their approval history and identity provider mappings remain intact for audit purposes.When to archive an access level:- A permission tier has been deprecated but historical requests should be preserved
- You are restructuring an application’s permissions and need to retire old levels
- A level was created in error and should be hidden from new requests
- A level only applies during specific periods and should be hidden between cycles
Open the Access Levels tab
Archive the access level
Assignment strategies
Assignment strategies control how approvers are assigned to access request tickets. Configure different strategies for different access levels based on risk and organizational requirements.Auto
Auto
- Low-risk applications that don’t require oversight
- Self-service applications with built-in approval mechanisms
- Testing or development environments
- Applications where immediate access is acceptable
- Request is approved immediately upon submission
- System bot is recorded as the approver
- No waiting period or manual review required
All
All
- Multiple people are qualified to approve
- You want the fastest response from a pool of approvers
- Cross-functional teams where any member can approve
- All approvers in the list are assigned to the ticket
- Any single approver can approve the request
- First approval completes the approval step
Round Robin
Round Robin
- Balancing approval workload across team members
- Applications with multiple qualified approvers
- Avoiding bottlenecks from single points of approval
- Ensuring fair distribution of approval responsibilities
- Automatically tracks and rotates through approvers
- Assigns the next approver in the sequence
- Only one approver is assigned per request
- Ensures fair distribution across subsequent requests
Identity provider integration
Map access levels to groups in your identity provider for automated provisioning after approval. When a workflow provisions access, it can automatically add users to the appropriate groups in Okta or Google Workspace.Okta
Connect your Okta integration and map access levels to Okta groups. After approval, workflows can automatically assign users to applications or add them to groups.How it works:- In the Okta integration settings, connect your Okta organization
- When creating an access level, select the corresponding Okta group from the dropdown
- In your workflow, use Okta actions to provision access after approval:
- Add Users to Application: Directly assign users to Okta applications
- Add Users to Group: Add users to Okta groups that grant application access
Connect Okta integration
Map access levels
Configure workflow provisioning
Google Workspace
Connect your Google Workspace integration and map access levels to Google Groups. After approval, workflows can automatically add users to the mapped groups.How it works:- In the Google Workspace integration settings, connect your workspace
- When creating an access level, select the corresponding Google Group from the dropdown
- In your workflow, use Google Workspace actions to provision access after approval:
- Add Users to Group: Add users to Google Groups that grant application access
- Create Email Alias: Create email aliases for role-based access
Connect Google Workspace integration
Map access levels
Configure workflow provisioning