What applications provide
Application catalog
Centralized inventory of tools and systems your organization uses
Access level definitions
Different permission tiers for each application
Approval configuration
Control who approves requests for each access level
Identity provider integration
Map access levels to groups in Okta or Google Workspace
Setting up applications
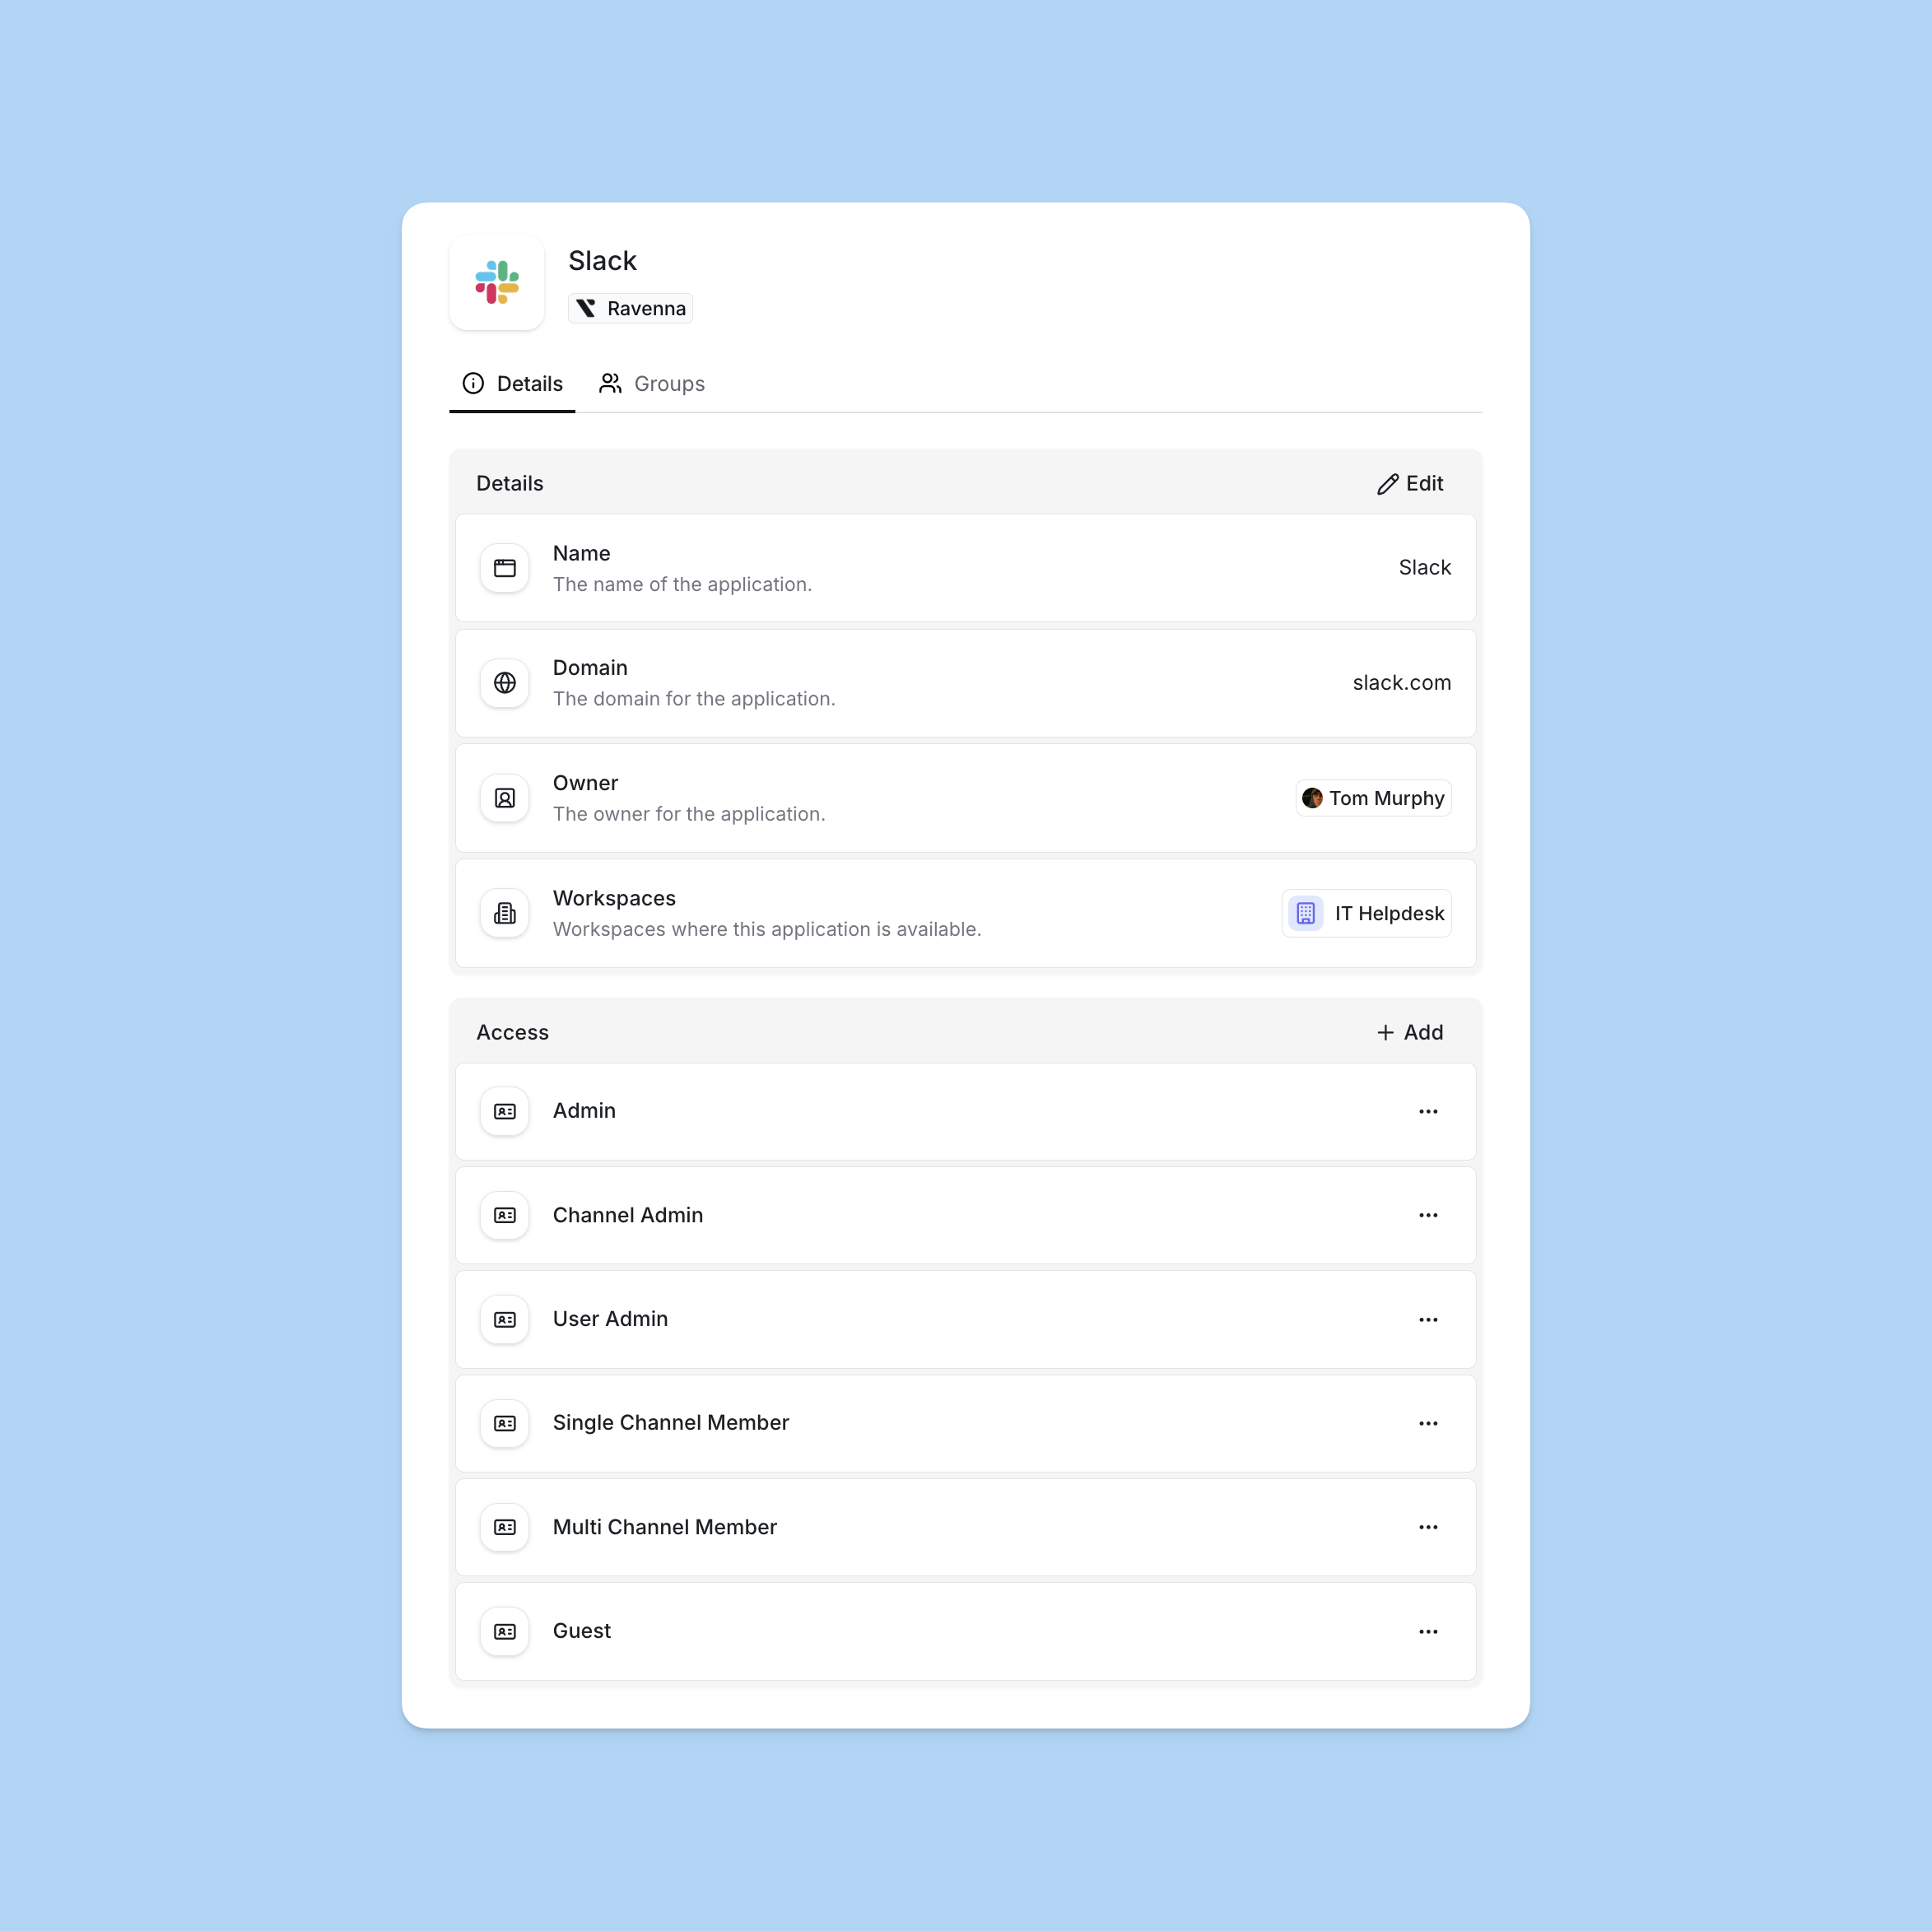
Create application entries to represent the tools and services your organization uses.Fill basic information
Provide the application details:
- Name: Display name for the application
- Domain: The application’s web domain (optional)
- Details: Rich text notes about the application (optional). These details appear in hover cards when users view the application in ticket custom fields.
- Owner: Person or team responsible for managing this application
- Workspaces: Select which workspaces can surface this application via request forms
Configure access levels
Add access levels to define the different permission tiers available for this application.
Access levels
Access levels define the different permission tiers available within an application. Each access level represents a specific set of capabilities users can be granted.Why use access levels?
Access levels help organizations implement least-privilege access by allowing users to request only the permissions they need for their role. This reduces security risk while maintaining operational efficiency.Model real permissions
Define levels that match how your organization actually uses each application
Reduce over-provisioning
Grant only the access users need for their specific role
Streamline requests
Users select specific levels, reducing approval back-and-forth
Support compliance
Maintain clear records of what access each user has
Creating access levels
Configure the level
Provide:
- Name: Clear name indicating what this level grants (e.g., “Admin”, “Editor”, “Viewer”)
- Description: Detailed explanation of what permissions this level includes
- Assignment strategy: How approvers are assigned when users request this level
- Approvers: Who can approve requests for this access level
Learn about user groups including synced groups from identity providers
Example access level structure
Access levels should reflect how your organization actually uses each application. Here’s an example for Slack:| Access Level | Description |
|---|---|
| Admin | Full admin capabilities including workspace settings |
| User Admin | User administration without workspace configuration |
| Channel Manager | Create, edit, delete, and manage channels |
| Member | Standard user without admin capabilities |
Structure access levels based on actual usage patterns in your organization, not theoretical permission models.
Assignment strategies
Assignment strategies control how approvers are assigned to access request tickets. Configure different strategies for different access levels based on risk and organizational requirements.Auto
Auto
Automatically approves requests without human intervention. The system bot is assigned as the approver and the request is immediately approved.When to use:
- Low-risk applications that don’t require oversight
- Self-service applications with built-in approval mechanisms
- Testing or development environments
- Applications where immediate access is acceptable
- Request is approved immediately upon submission
- System bot is recorded as the approver
- No waiting period or manual review required
All
All
Assigns all specified approvers to the ticket. Any one of them can approve the request.When to use:
- Multiple people are qualified to approve
- You want the fastest response from a pool of approvers
- Cross-functional teams where any member can approve
- All approvers in the list are assigned to the ticket
- Any single approver can approve the request
- First approval completes the approval step
Round Robin
Round Robin
Distributes approval requests evenly across the approver pool. Only one approver is assigned per request.When to use:
- Balancing approval workload across team members
- Applications with multiple qualified approvers
- Avoiding bottlenecks from single points of approval
- Ensuring fair distribution of approval responsibilities
- Automatically tracks and rotates through approvers
- Assigns the next approver in the sequence
- Only one approver is assigned per request
- Ensures fair distribution across subsequent requests
Identity provider integration
Map access levels to groups in your identity provider for automated provisioning after approval. When a workflow provisions access, it can automatically add users to the appropriate groups in Okta or Google Workspace.Okta
Connect your Okta integration and map access levels to Okta groups. After approval, workflows can automatically assign users to applications or add them to groups. How it works:- In the Okta integration settings, connect your Okta organization
- When creating an access level, select the corresponding Okta group from the dropdown
- In your workflow, use Okta actions to provision access after approval:
- Add Users to Application: Directly assign users to Okta applications
- Add Users to Group: Add users to Okta groups that grant application access
Map access levels
When creating access levels in applications, select the corresponding Okta group from the dropdown menu.
Learn about Okta integration and automated provisioning
Google Workspace
Connect your Google Workspace integration and map access levels to Google Groups. After approval, workflows can automatically add users to the mapped groups. How it works:- In the Google Workspace integration settings, connect your workspace
- When creating an access level, select the corresponding Google Group from the dropdown
- In your workflow, use Google Workspace actions to provision access after approval:
- Add Users to Group: Add users to Google Groups that grant application access
- Create Email Alias: Create email aliases for role-based access
Connect Google Workspace integration
Navigate to Settings > Integrations and configure your Google Workspace connection.
Map access levels
When creating access levels in applications, select the corresponding Google Group from the dropdown menu.
Learn about Google Workspace integration and automated provisioning
See the Setting up access requests guide for step-by-step instructions on building complete access request workflows